Newsletter Manual
Newsletter is a form of advertising our products or services, they are simply used to provide the information to everyone in a effective and efficient way, in here we can create the templates of our message and send them to everyone, which will give a easy understanding and clear idea on what we wanted to convey. It is very useful to send the information to multiple users at a time and it will give complete management on what to send, how to send, whom to send, and it will also provide the management on how many users viewed it and how many subscribed it or un-subscribed it. It is one of the best ways to advertise the information. The Management of newsletters is explained below in detail.
The Newsletter consists of the following.
1. Create Newsletter
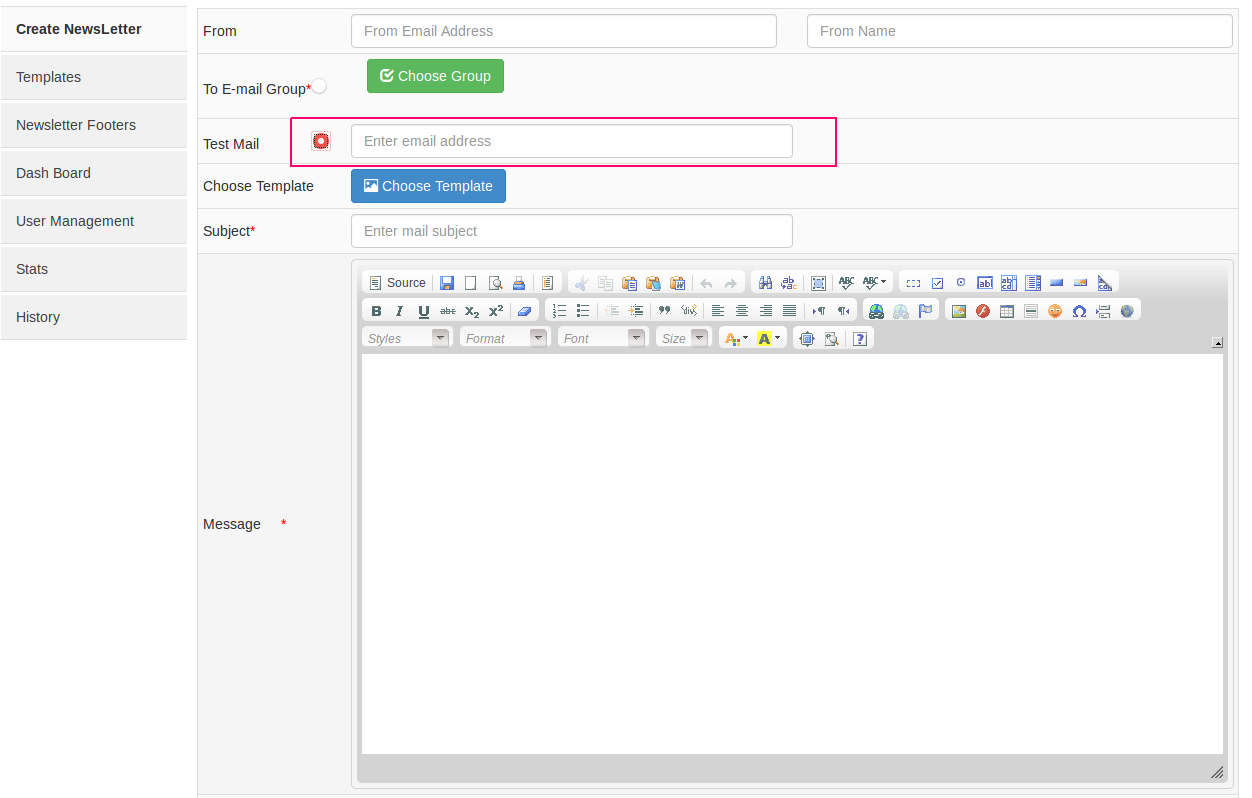
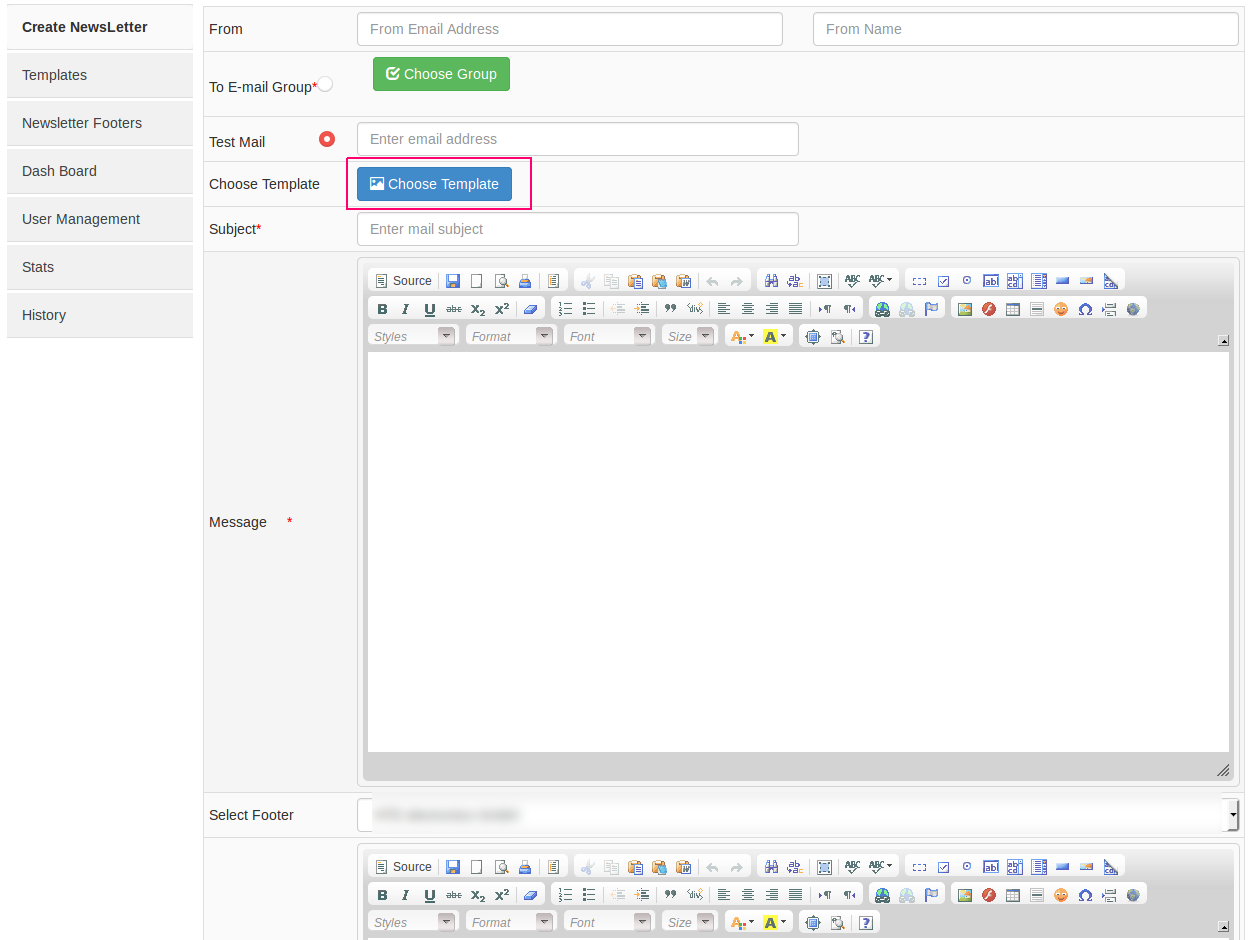
To create the Newsletter, when you click on Create Newsletter you will be opened with a form which consists of all the required fields to create the newsletter. In that form you need to fill the From email address and From Name , to show from whom the newsletter is sent and after that you will have options to select to whom you want to send this News letter. If you want to send it to a group of people then you can select the To E-mail Group and there is a button called Choose Group by clicking that a pop-up will be opened with the existing groups and option to select all the groups or a single or multiple groups. Once the group is selected, the selected group name will be displayed. And if you want to send the newsletter to a single email then you can select the Test mail radio button and a empty text box will be allowed to enter the email of the receiver. After entering the email you need to select the Template. To choose the template click on Choose Template and a pop-up with the existing templates will be opened. Select the desired template and click on it a pop-up with complete template preview will be opened and an option to select it. By clicking on the Choose this Template button the template will be added to the Message body part of the mail. If you wanted to made any changes in the message body, you can do that as there is an editor is provided to do so. After selecting the template, you need to enter the Subject of the email, and it is Mandatory. And after finished with the message you need to select the Footer, which you wanted to be the footer for the newsletter. To select the footer click on drop down list on select footer and from there you can select the footer and the footer will be displayed blow the selection in Footer content and will be provided with the editor if you want to make any changes to that. And after that there is attachment option is also available to attach any files as per your desire. Once all these data and the mandatory fields are entered you can click on the send button to send the newsletter. The same process is explained below with the Images.
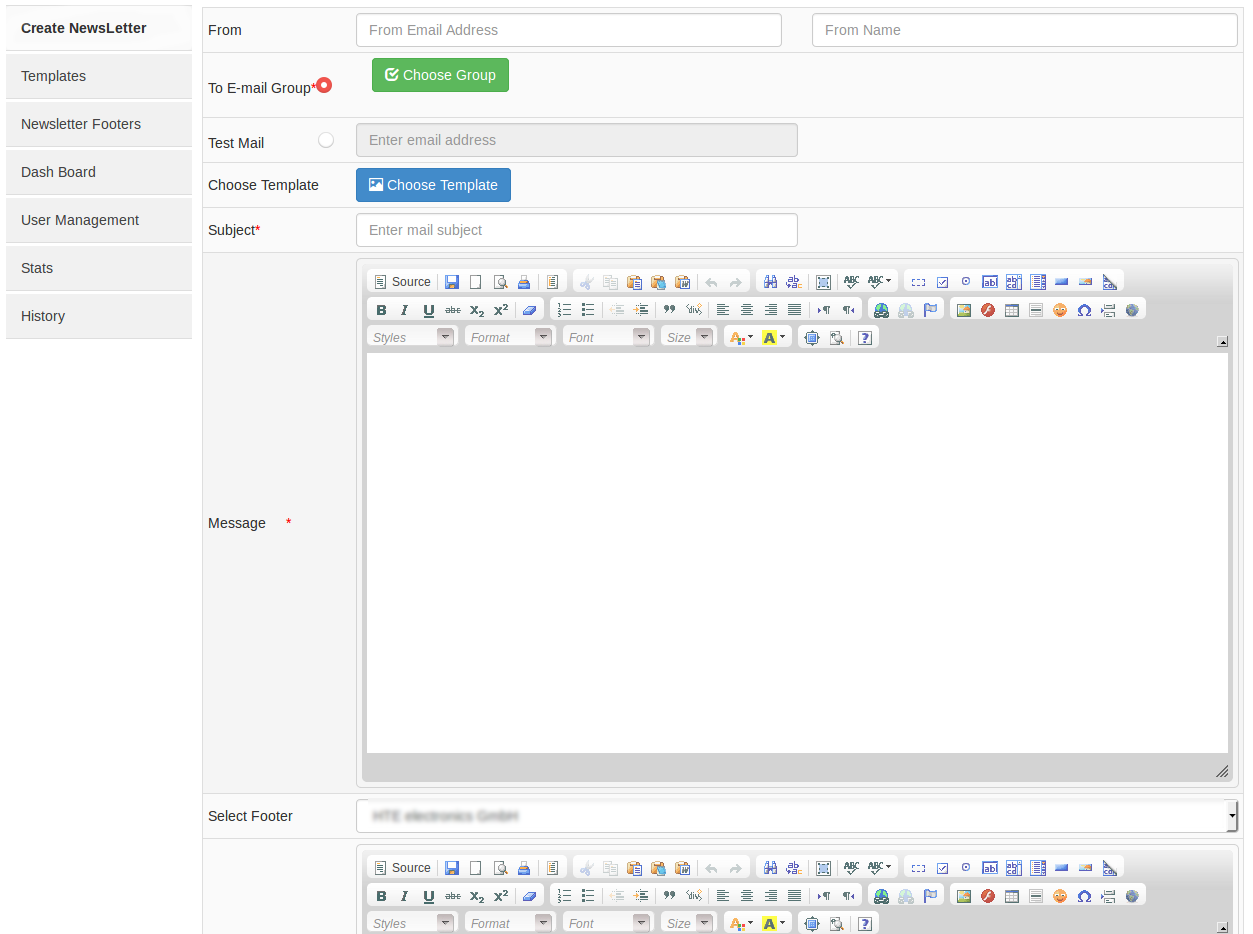
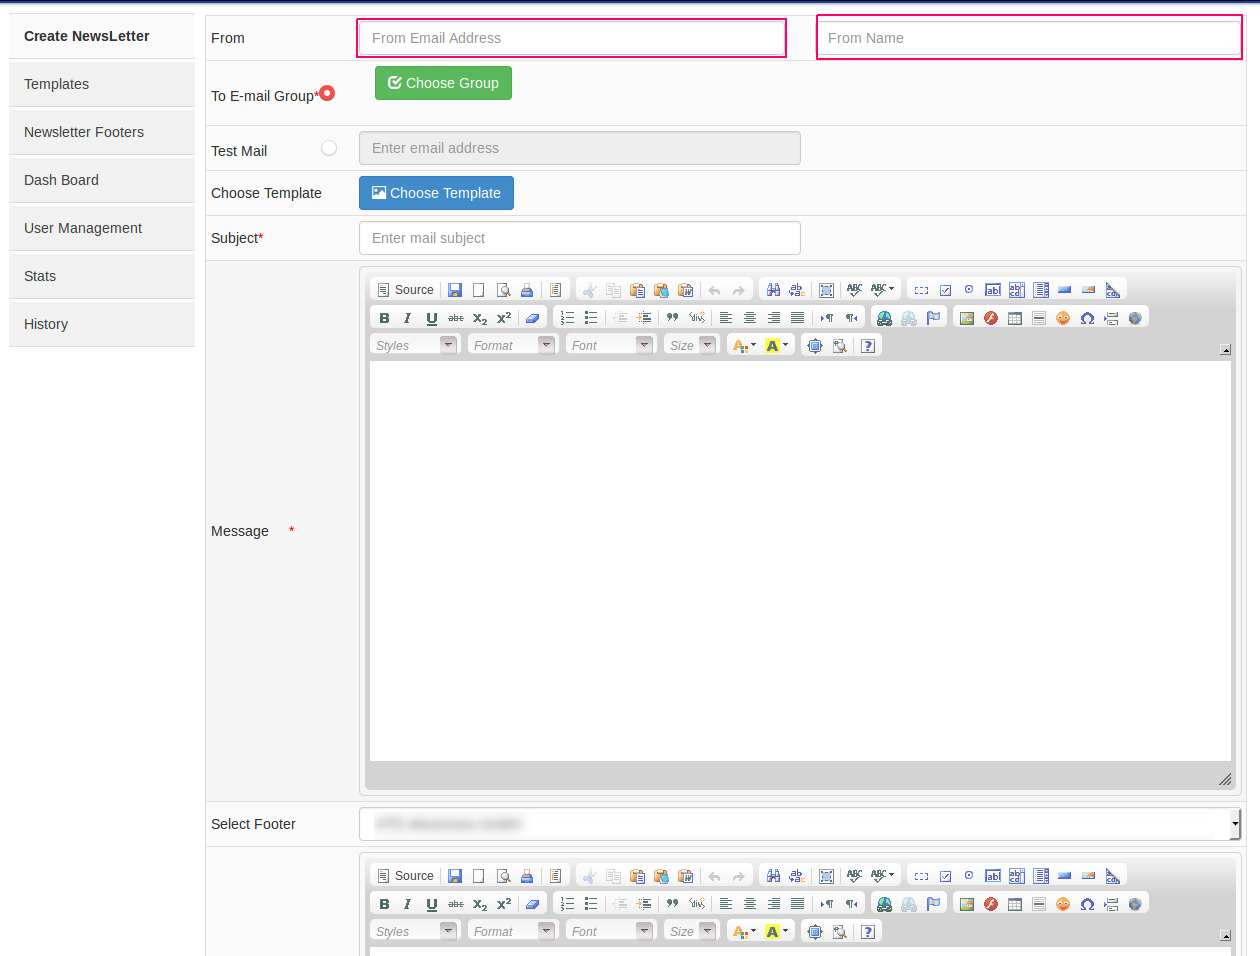
After clicking on Create Newsletter, Enter the From Email and From name
After that clicking on Choose Group to select the Group to whom the newsletter will be sent

After clicking on that button a pop-up will be opened with the existing group details to select
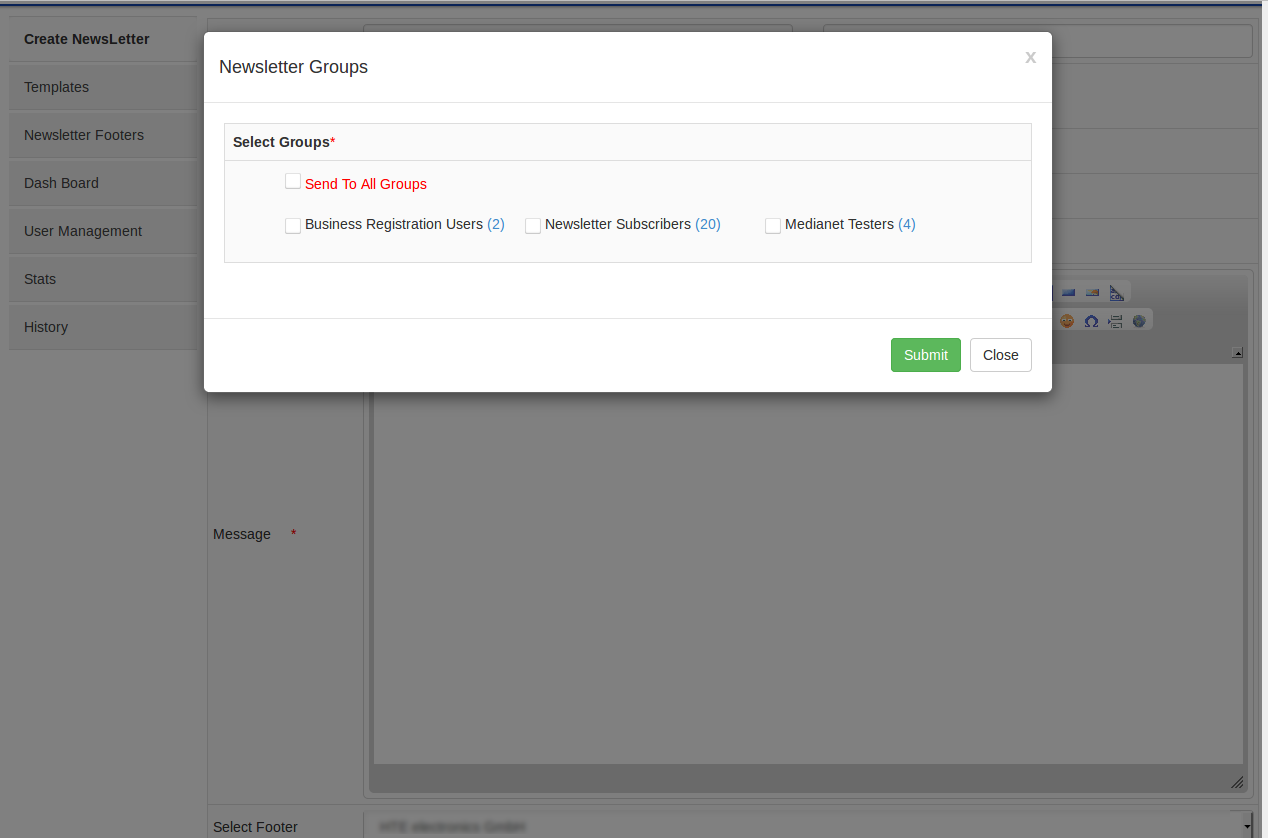
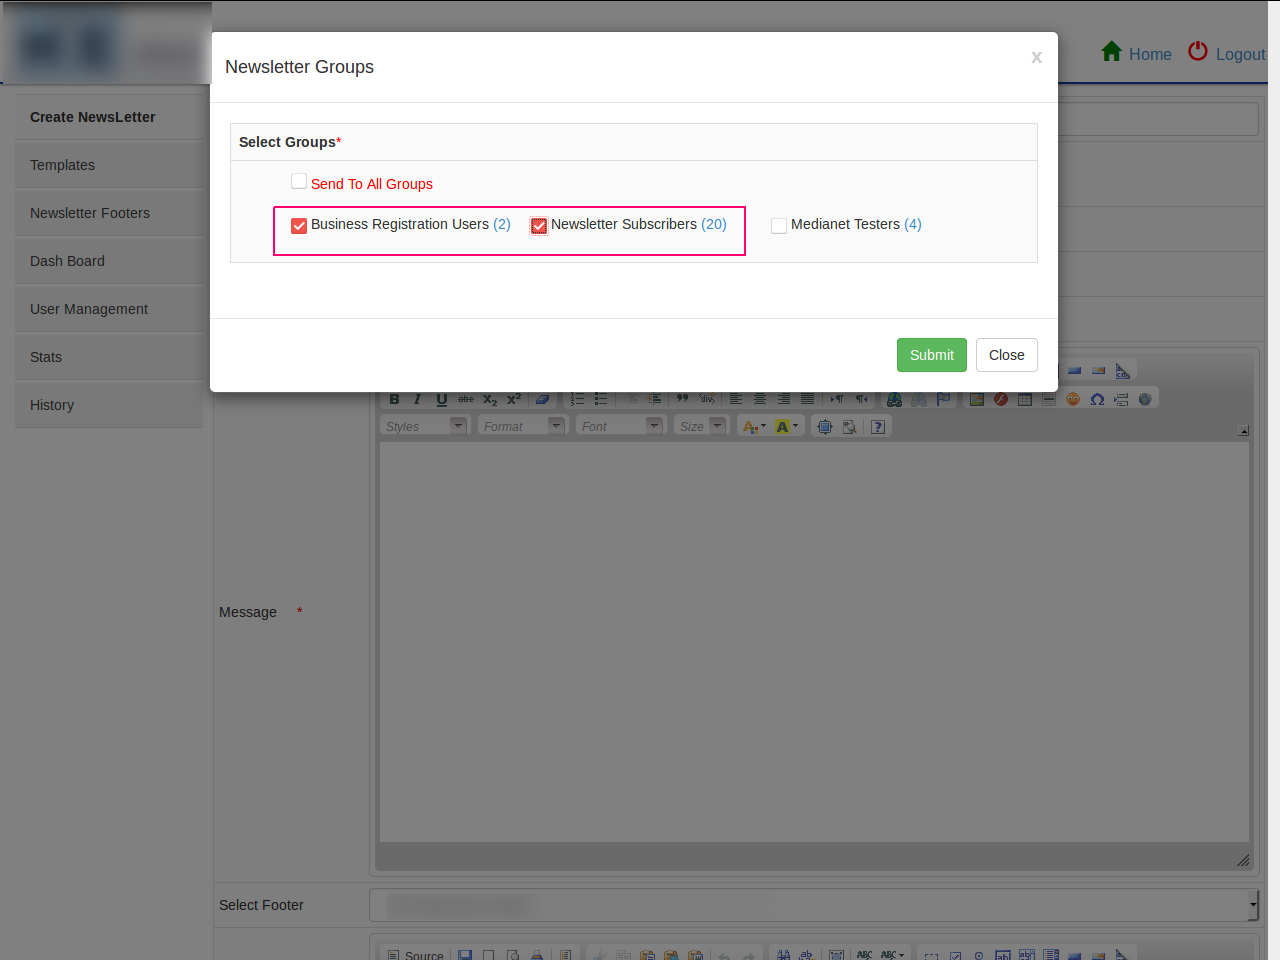
One can select multiple groups.
And even an option to select all groups is also provided. Once you select Send to all groups, all the groups will be automatically selected.

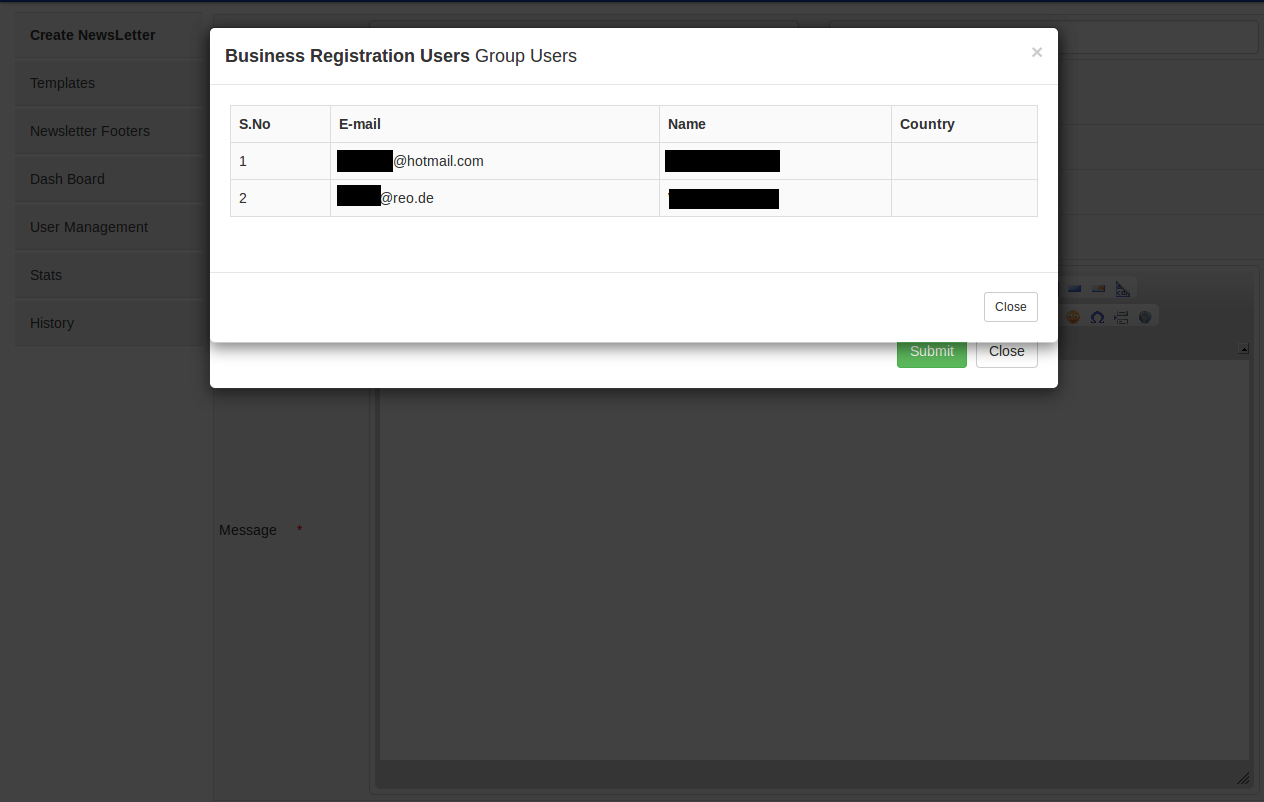
To see the mails that are in the group, just click on the Number beside the group name and a pop up with list of emails will be open.
After selecting the group the name will be displayed.

Or if you want to send the mail to a single person then you can select the option Test mail and it will give the text box to enter the email.
After entering the to mail need to select the Template.
Once you click on the Choose template, a pop-up with the list of templates will be opened
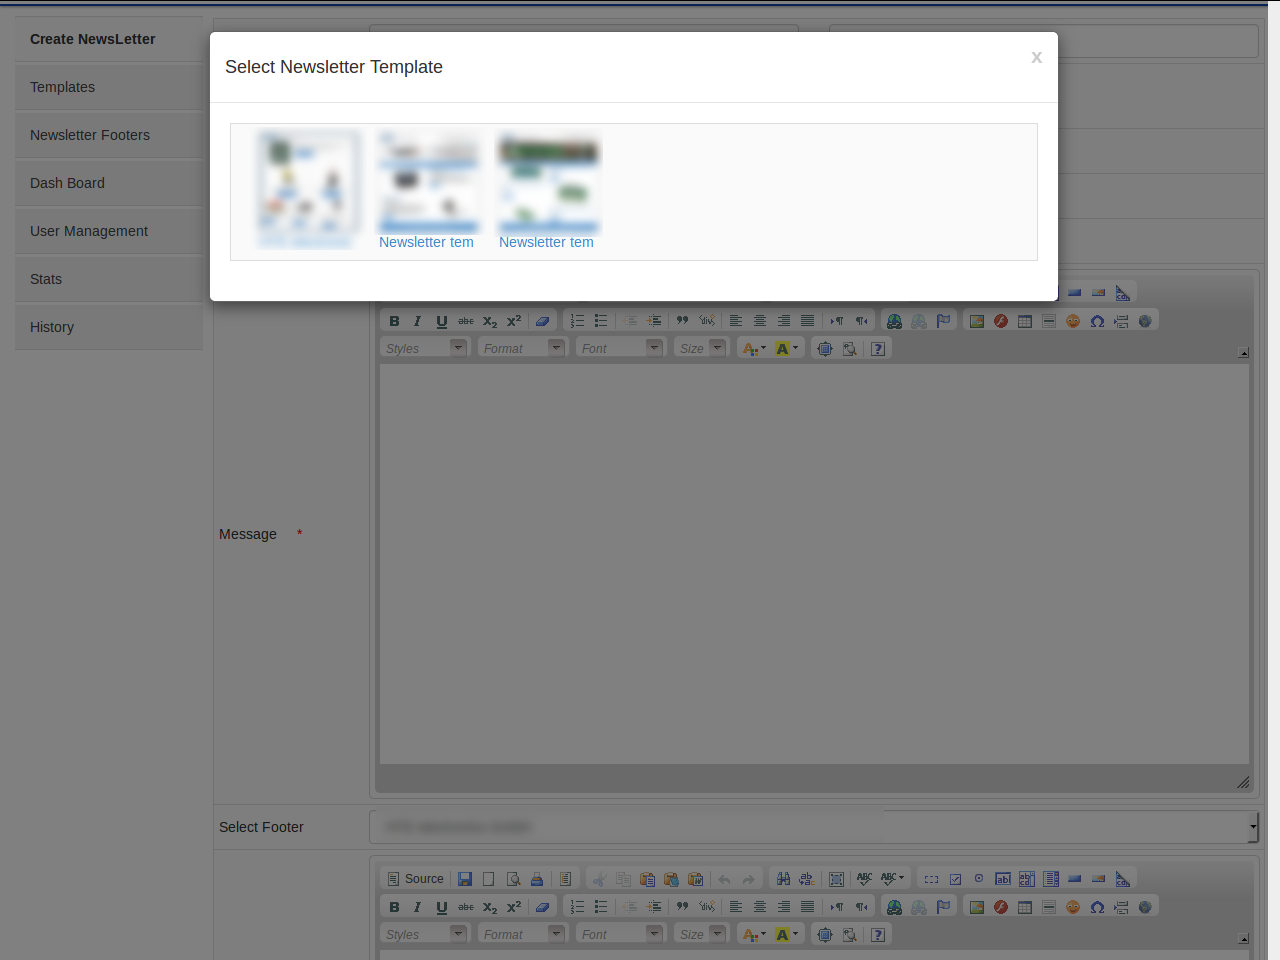
from the list you can select the template. Once you click on the template it will show the template preview and option to select it.
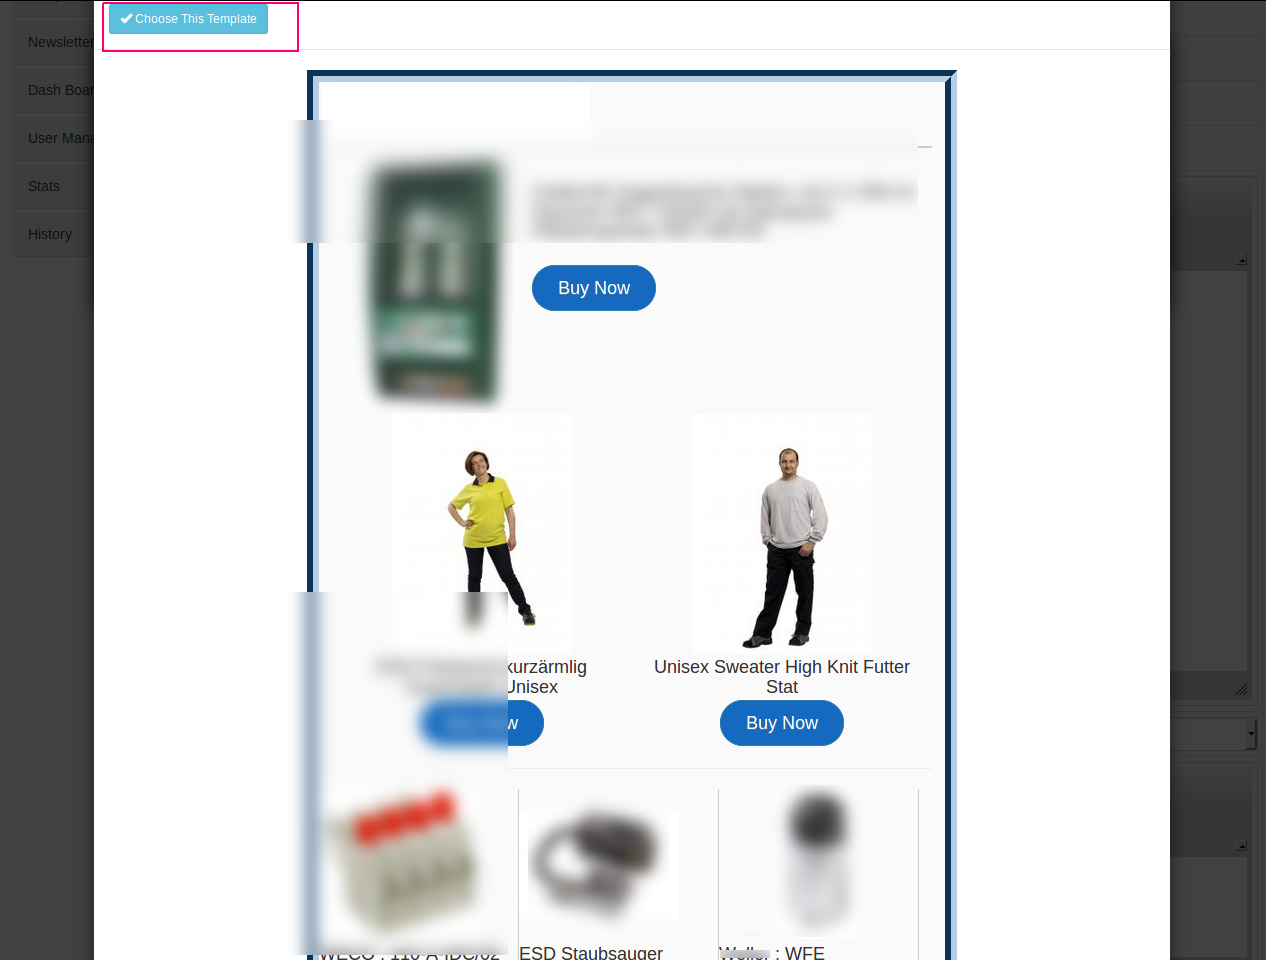
By clicking the Choose this template the template will be in Message box.

After the Template selection enter the Subject for the mail

After selecting the template you can select the Footer. Select the footer by clicking the drop down button we can select the footer.
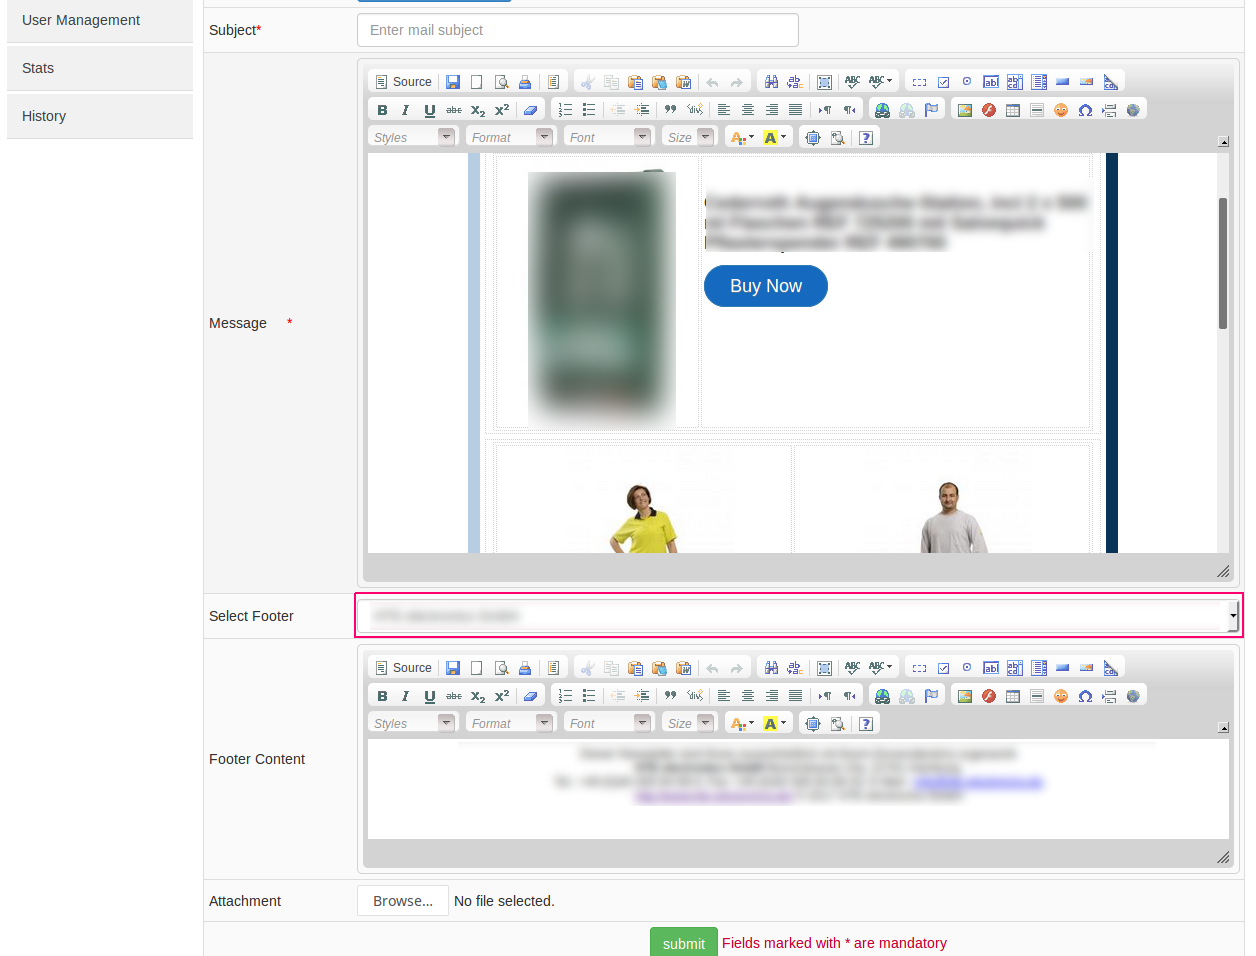
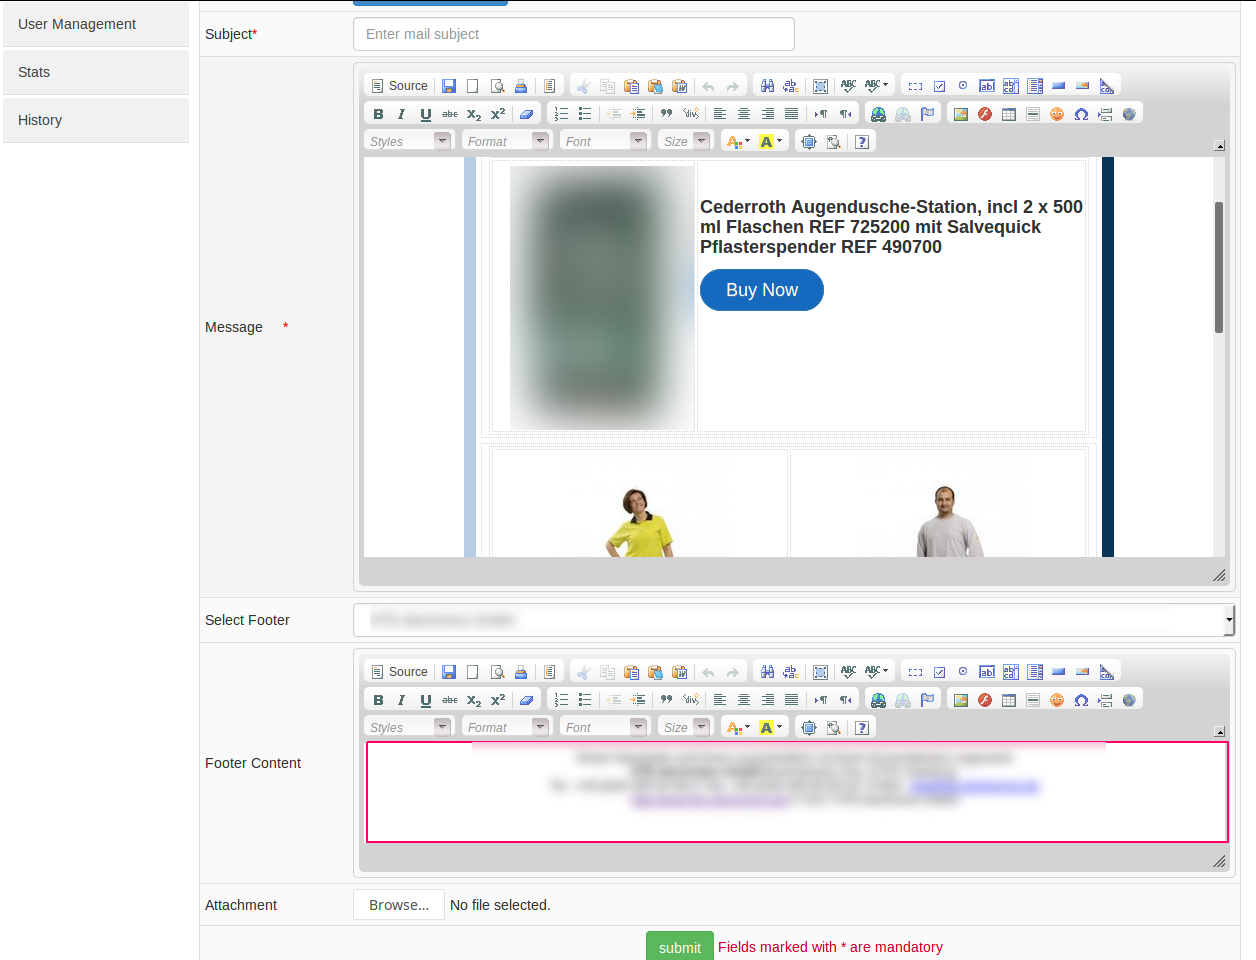
By selecting the footer the footer will come to the Footer content.
And we can attach some attachments to this newsletter by clicking on the Browse button and can select the files to attach.

After providing all the information simply click on submit and the newsletter will be sent. Like this one can create the Newsletter.
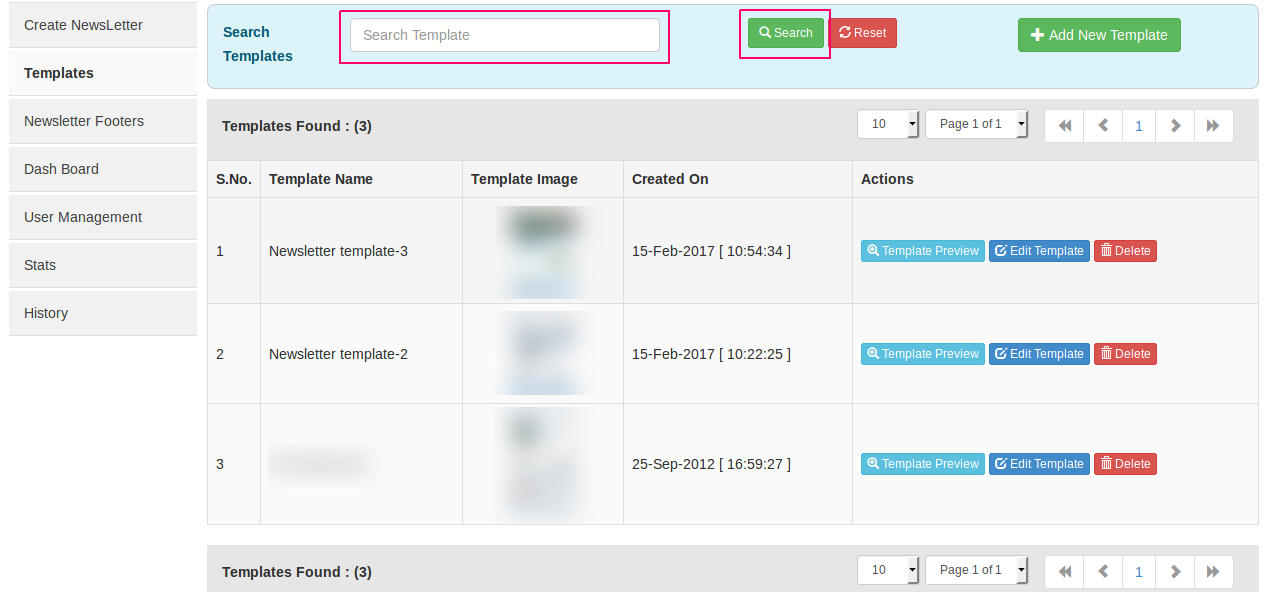
2. Templates
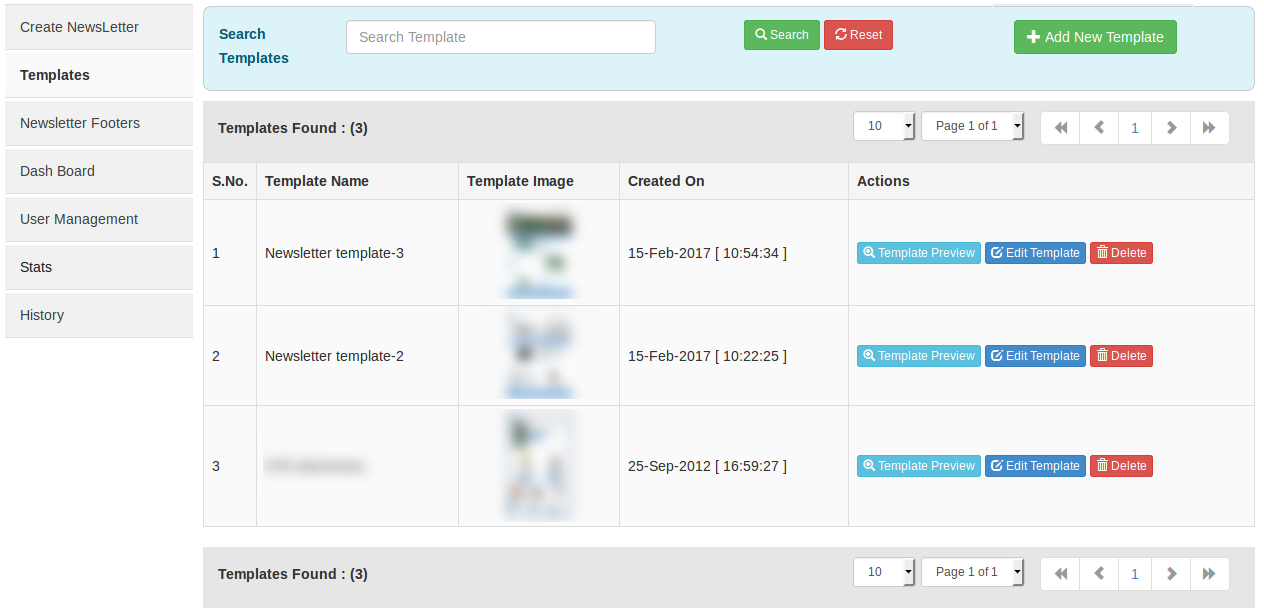
By Clicking on the Template menu, a table with all the templates will be opened and with the template management options like Template editing , template preview and delete. And it will give option to add the new Templates. To add new templates click on that button and it will give options to add new template. By entering the required details you can create the template.
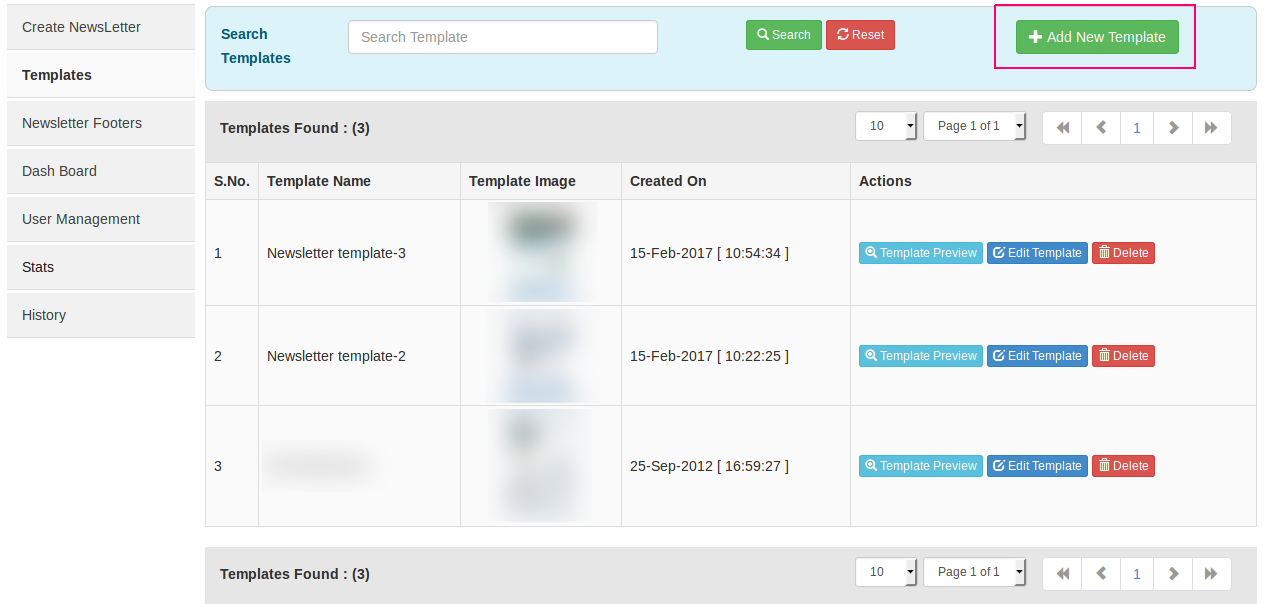
Click on the Templates tab and the fallowing screen will appear
To add the new template click the Add new Template button
once you click the Add New Template button, a pop-up will be opened like fallows
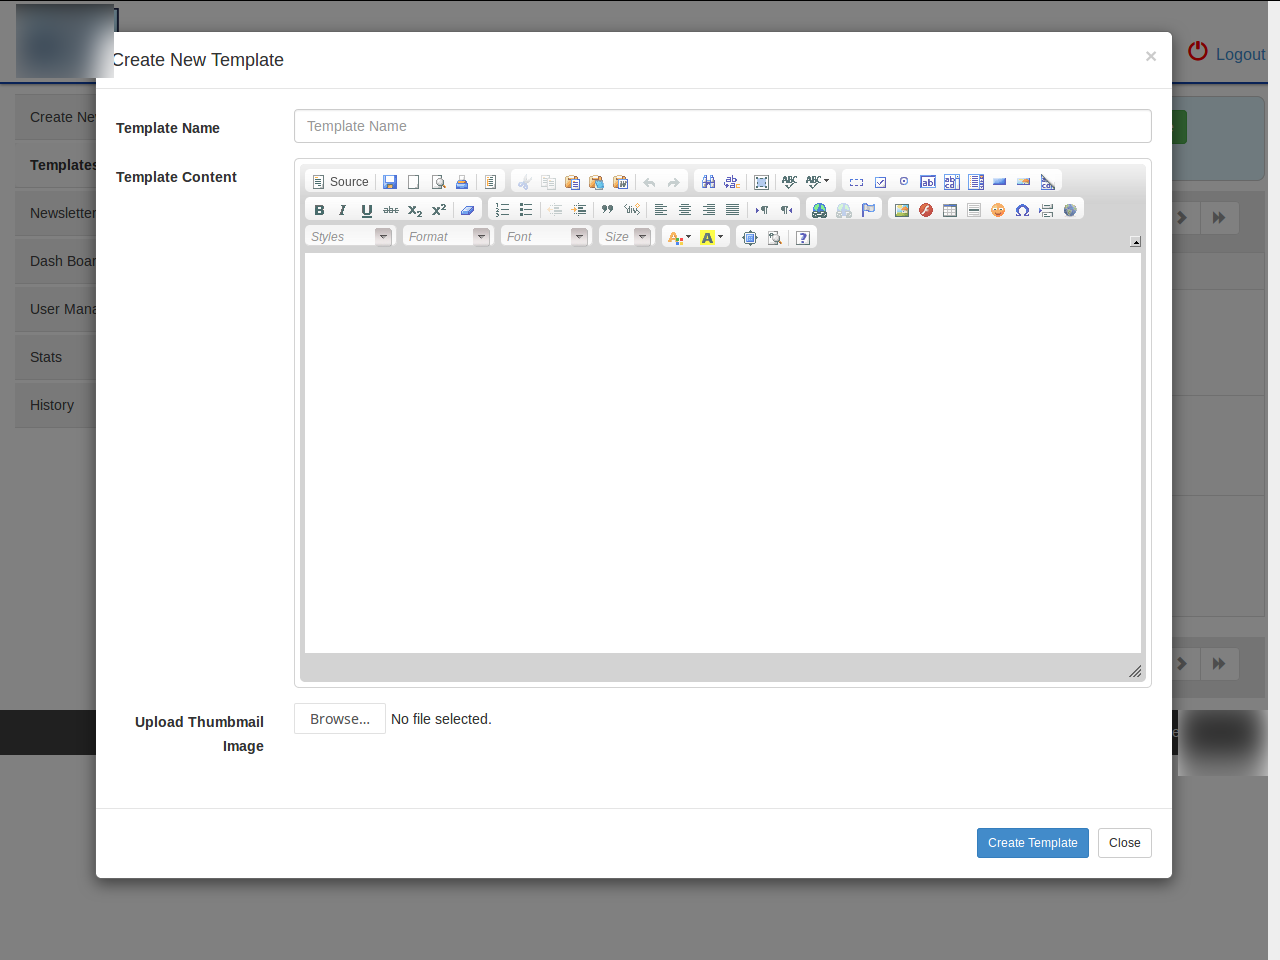
fill the details and you can create the template. And the created template will be shown in the table.
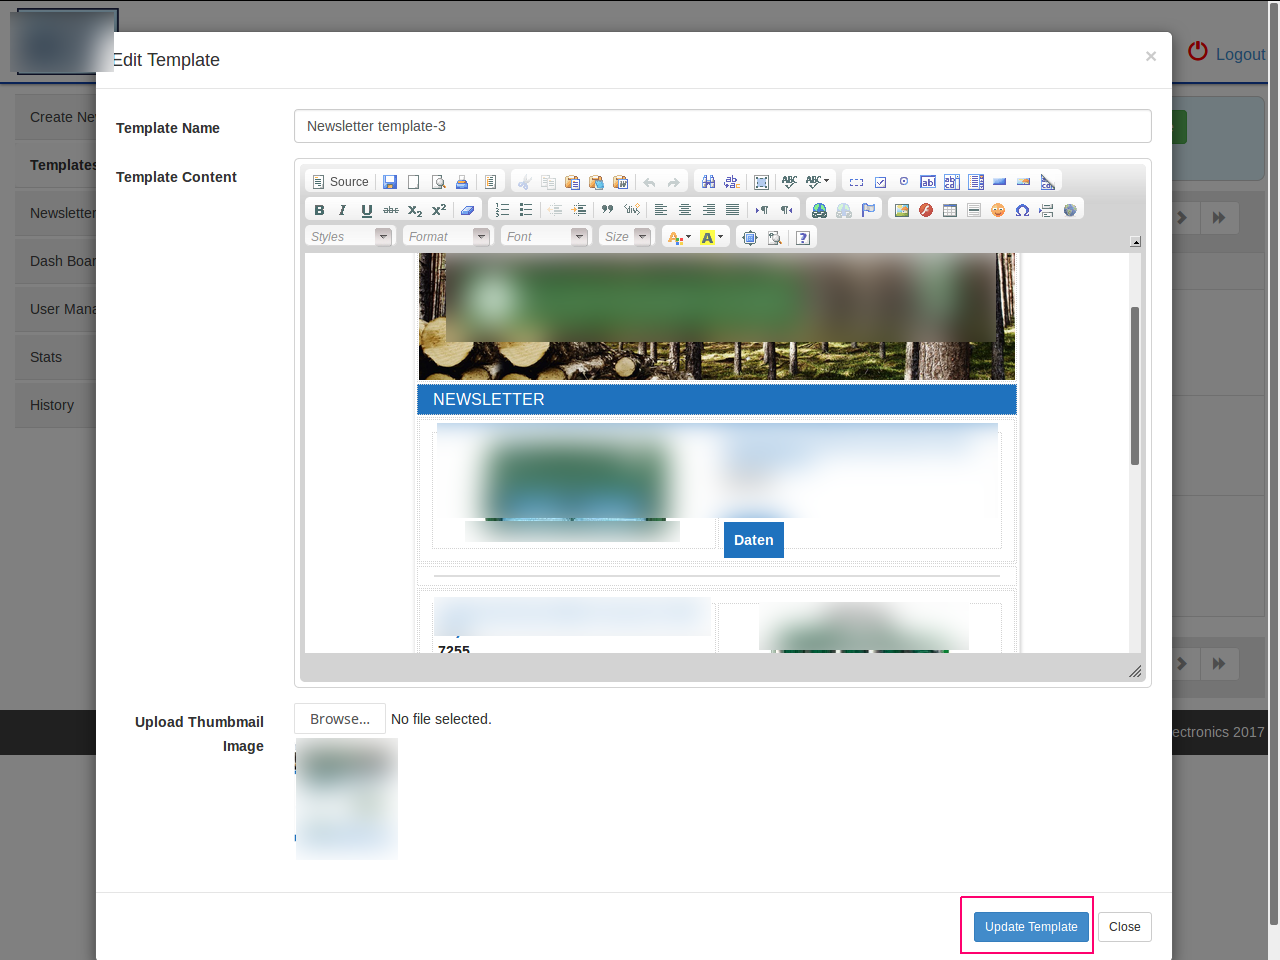
To edit the template click on the edit template button in the table.

By clicking the above button a pop-up with the editor to edit the template will be opened and what ever the changes you wanted to make can be done there and can save the changes by clicking the Update Template button.
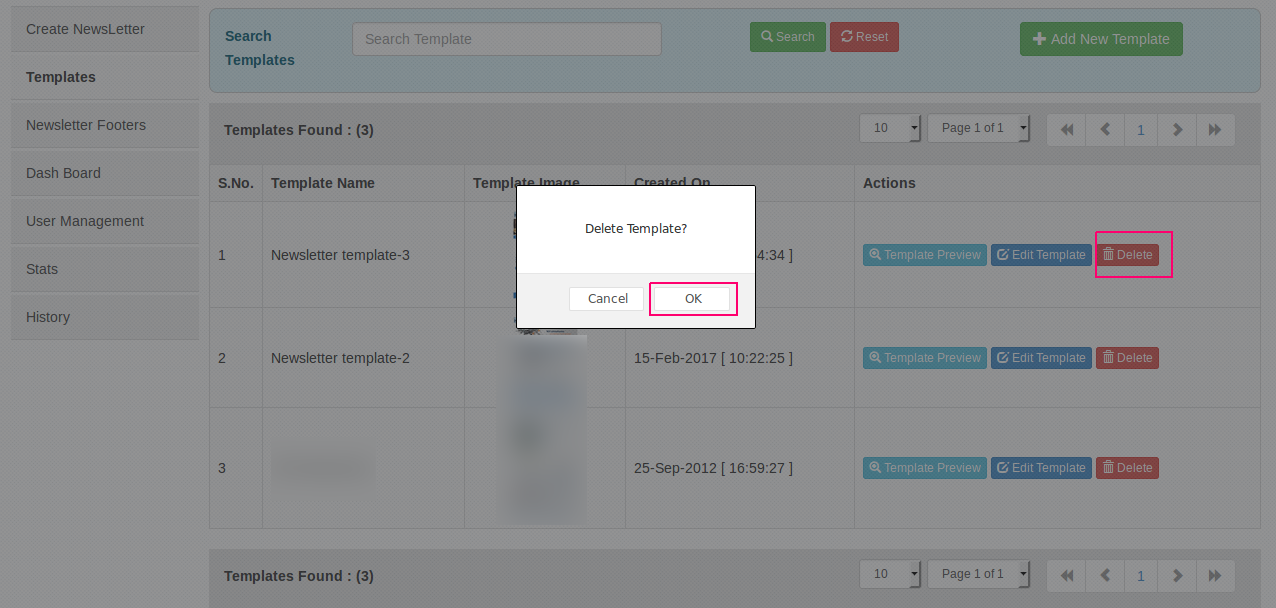
If you want to delete the template, click on the delete button of the template which you wanted to delete and a confirmation will be asked to delete or not click on OK and your template will be deleted.
And to search the templates in the table, simply enter the name of the template in the search box and click on the search button and it will show the templates list which are matched to the given name.
Like this one can manage the templates.
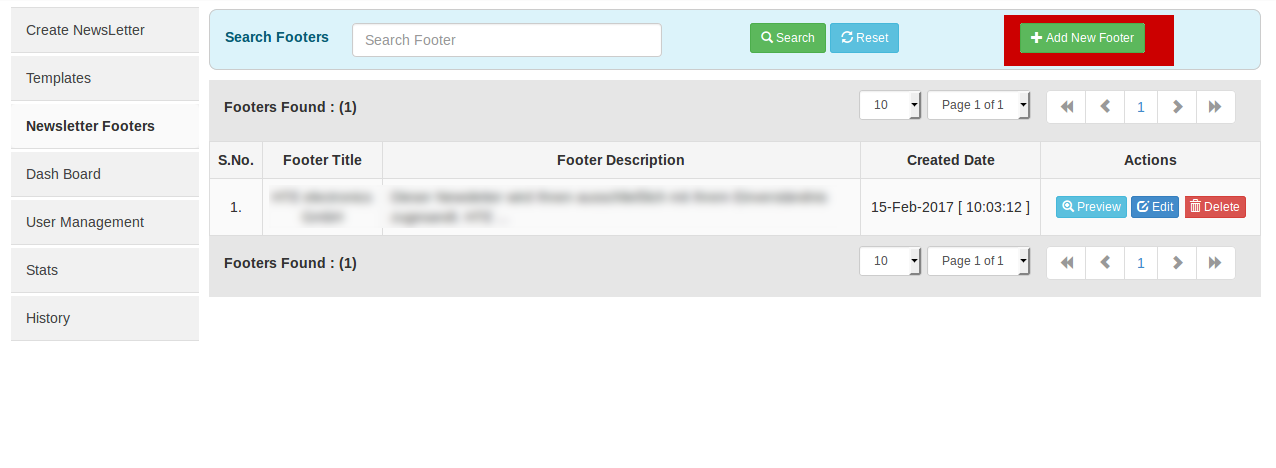
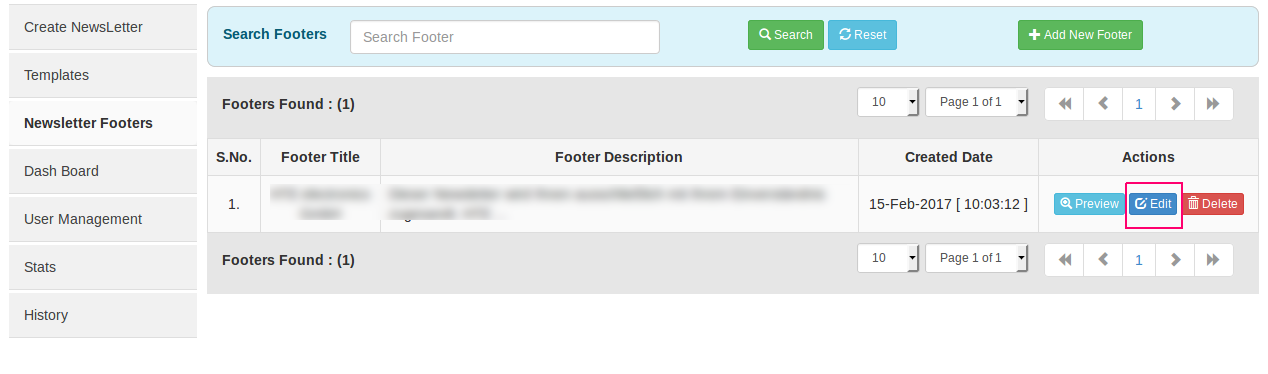
3. Newsletter Footers
News letter footers are used to create and manage the footers that we wanted to add to our News letter. And to enter into the News letter footers section click on the button in the side panel and you will be entered to the Footers management .
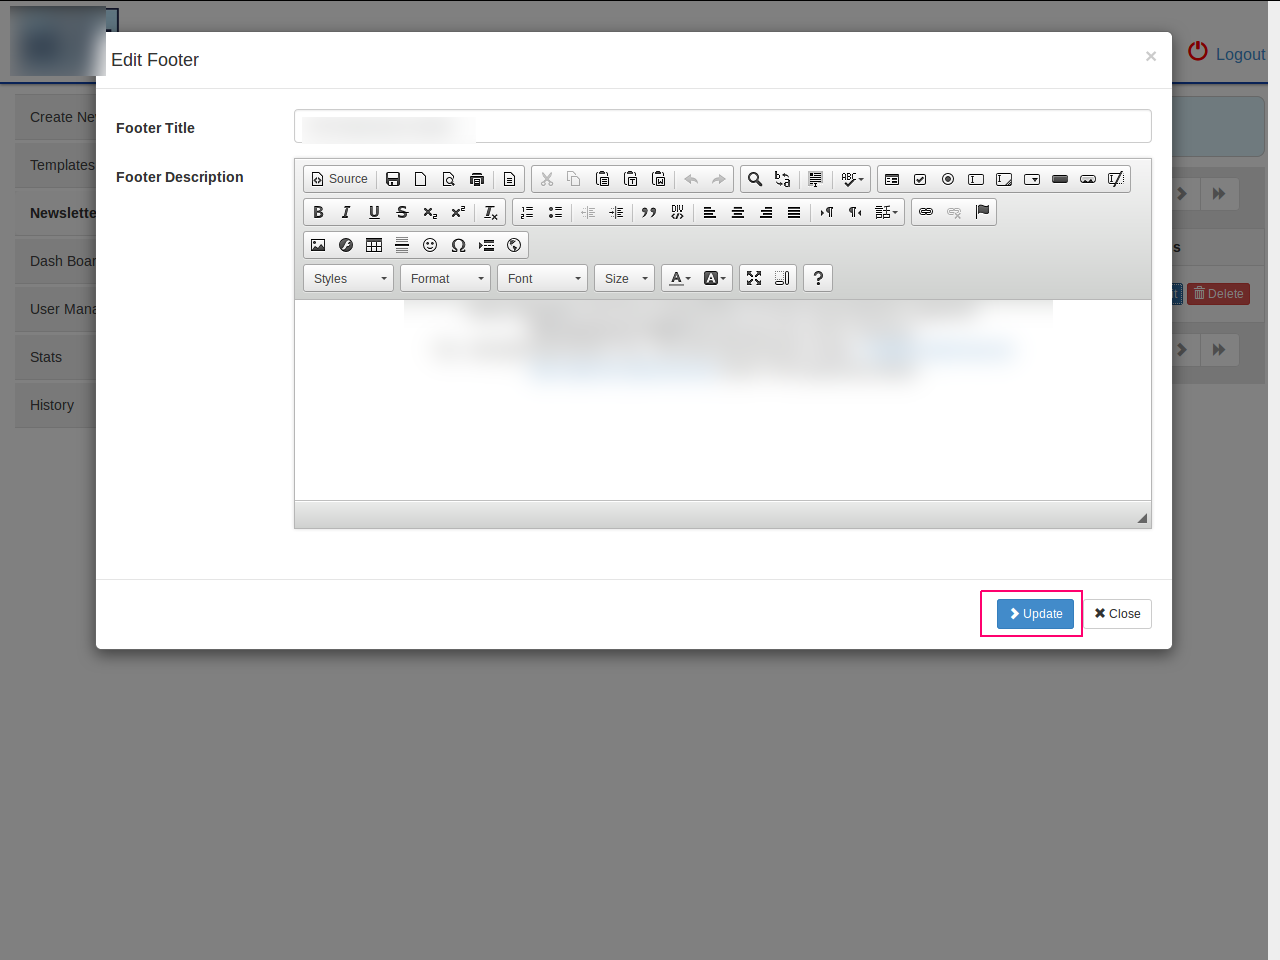
To create a new footer click on the Add new Footer button and a pop-up with the editor will be opened to create the footer. Give the footer name and enter the content and click on save the footer will be created.
A pop-up will be opened.
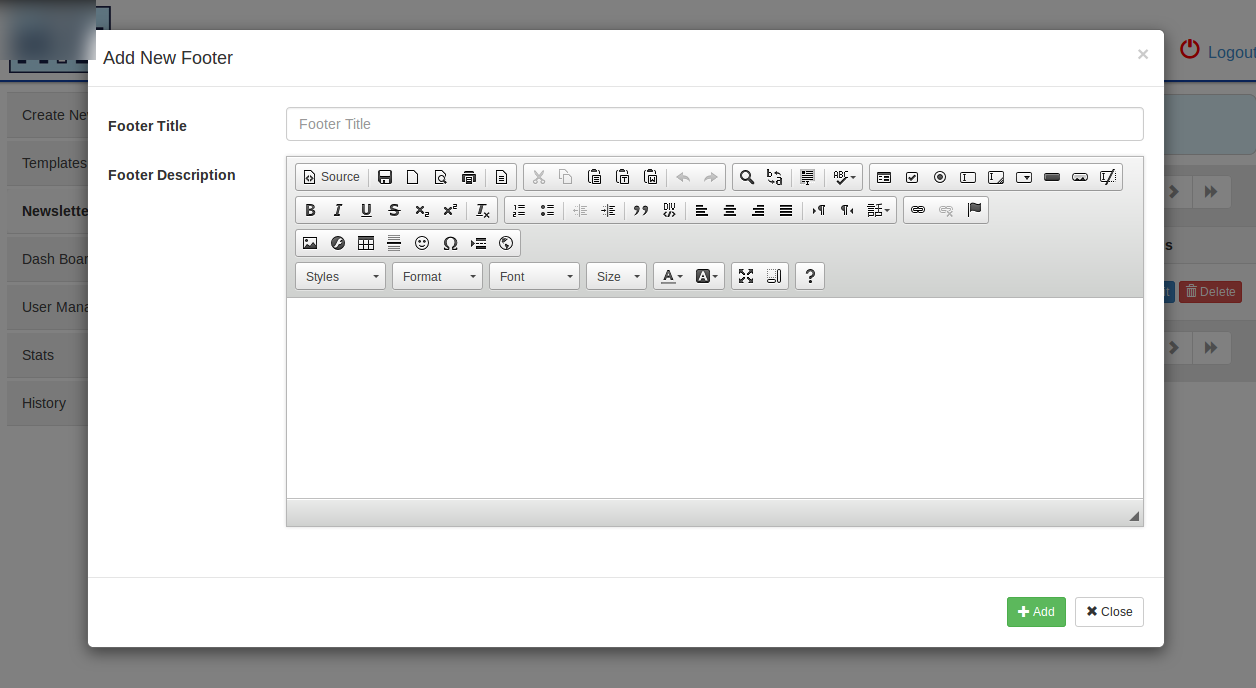
Enter the footer title and description that you wanted in the footer and click Add button and the footer will be added and you can select the footer into newsletter by selecting its name.
To edit the Footer, click on the Edit footer button of the respective footer which you wanted too edit and a pop up will be opened with the footer details and after the editing can be saved by clicking the Update Button.
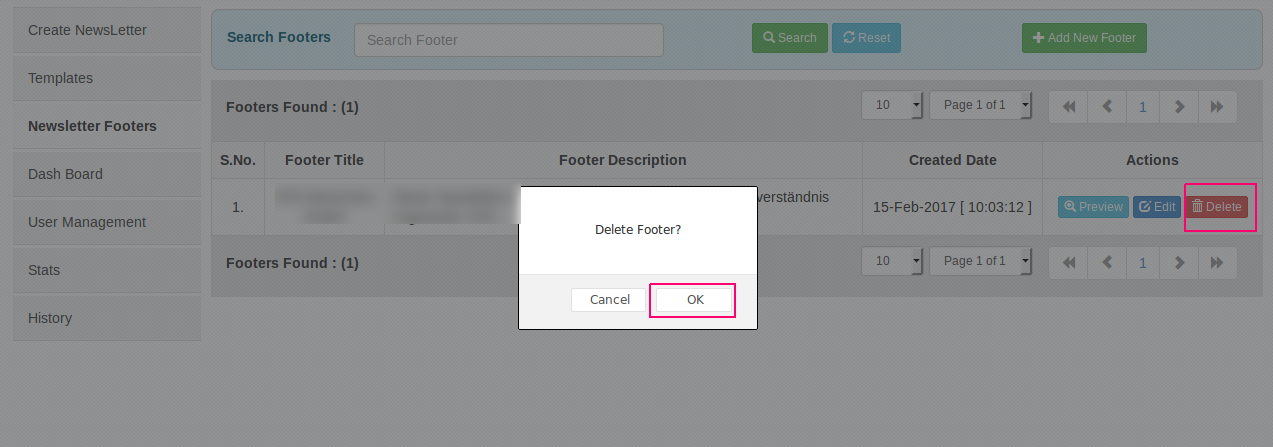
To delete the footer, click on the delete button of the footer and confirm the deletion , and the footer will be deleted.
Like this you can manage the News letter Footer.
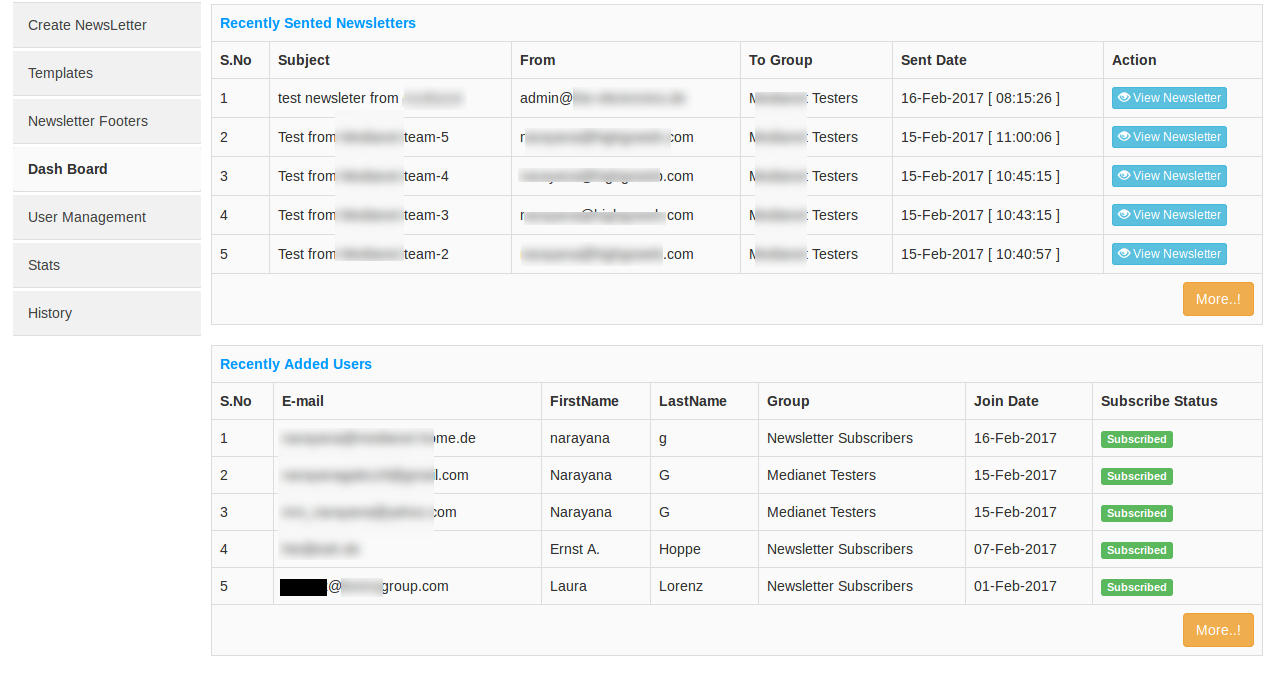
4. Dash Board
Dash Board consists of two tables showing the recently send newsletters and the Recently added Users. And it will option to see the send newsletter and the status of the user
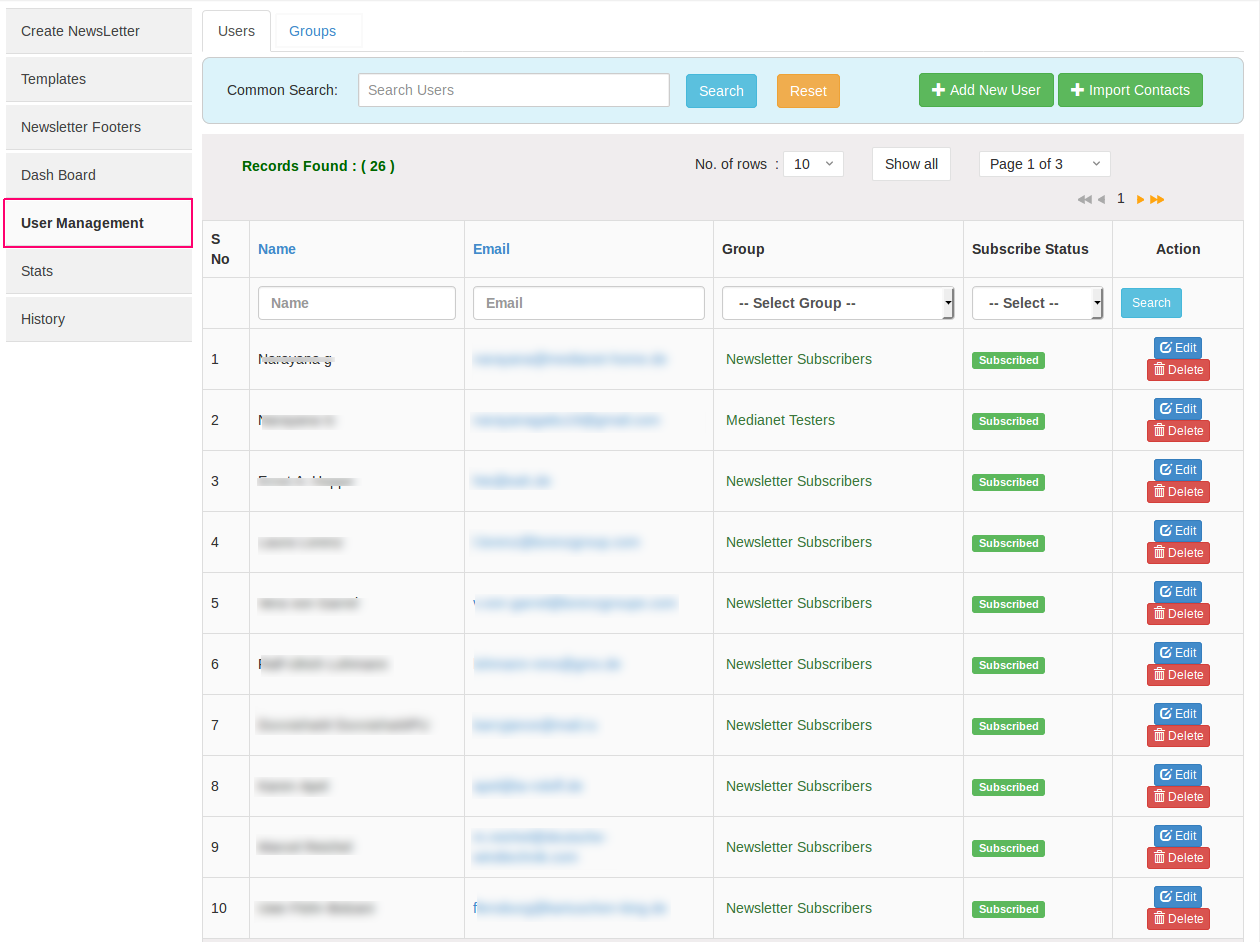
5 User Management
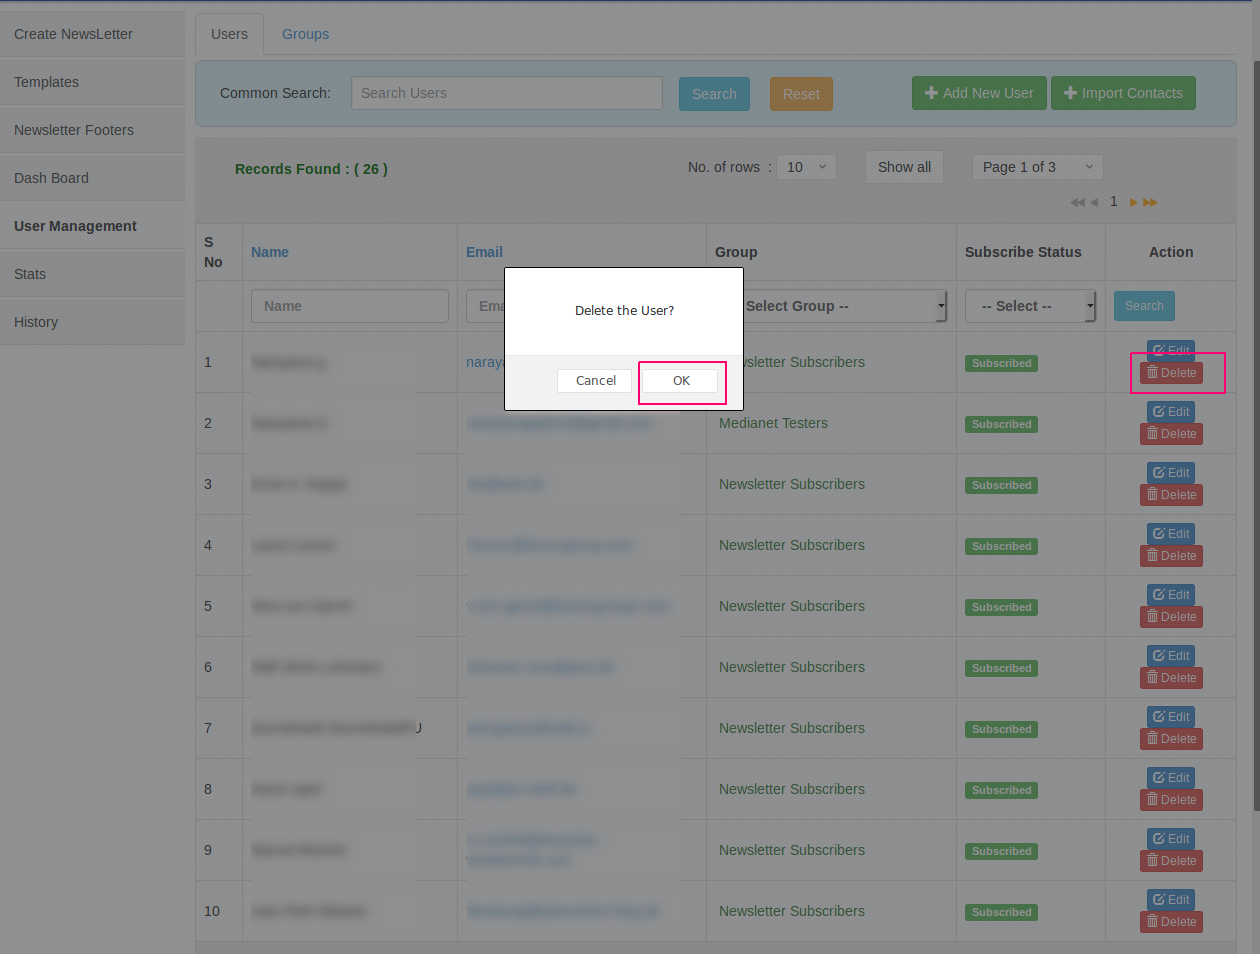
User Management consists of Managing Users and User Groups. Once you click on the User management tab a Table with the list of users will be opened. Table consists of Name of the user, user email, Group of the user, User subscription status and Options to edit and delete the user.
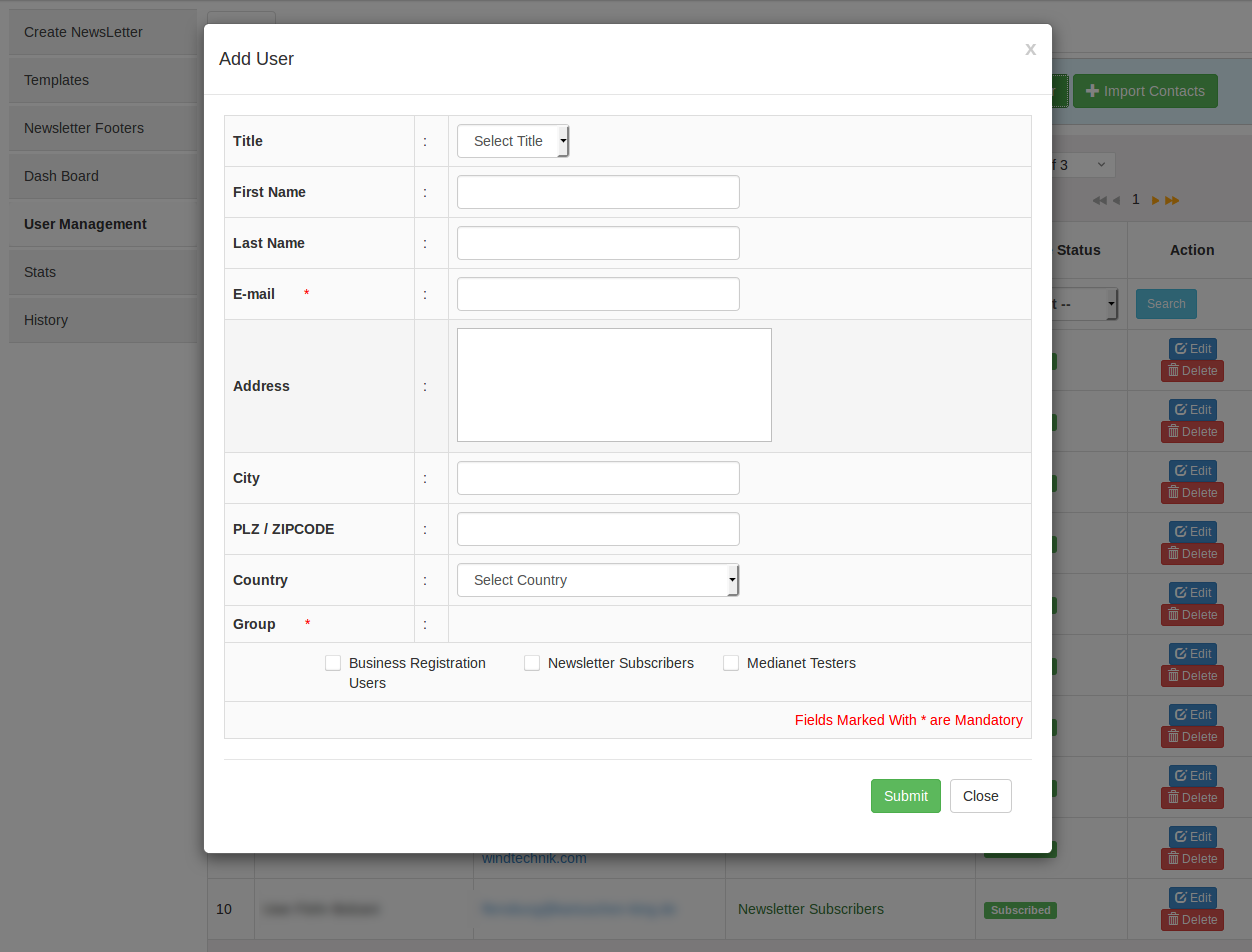
To add new user click on the Add New User button, and a pop-up with the user registration form will be opened, Enter all the Mandatory fields and click the Submit button, and the user will be created. And if you want to add this user to multiple groups we can do that by simply selecting the multiple groups while creating the User.
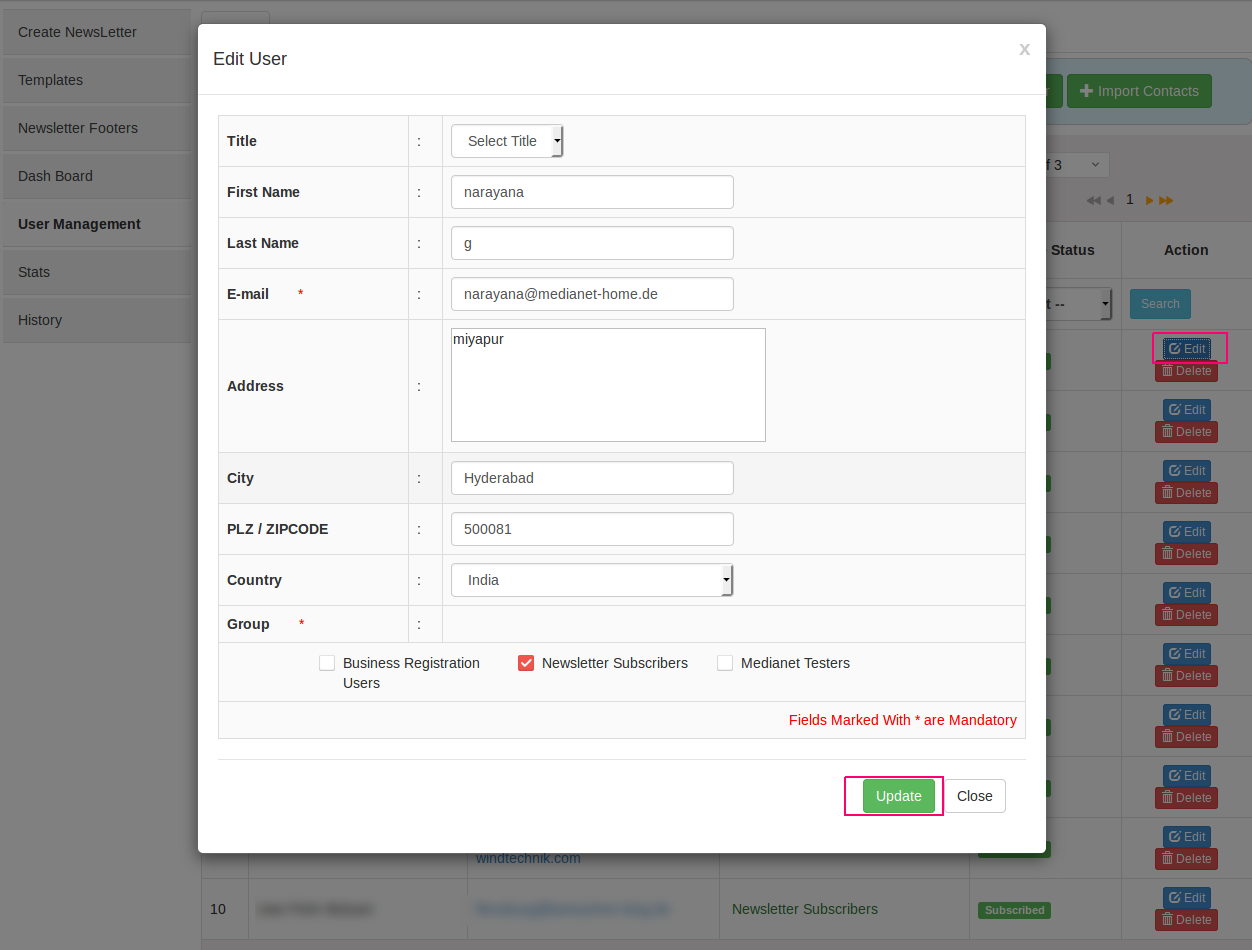
To edit the user click on the edit button of the user you wanted to edit, and a pop-up with the user information will be opened and allows editing , to save the edited changes click update or click cancel to cancel the editing.
To delete the user, Click on the delete button and Confirm the deletion.
To manage the Groups, click on the Groups Tab in the User management page.
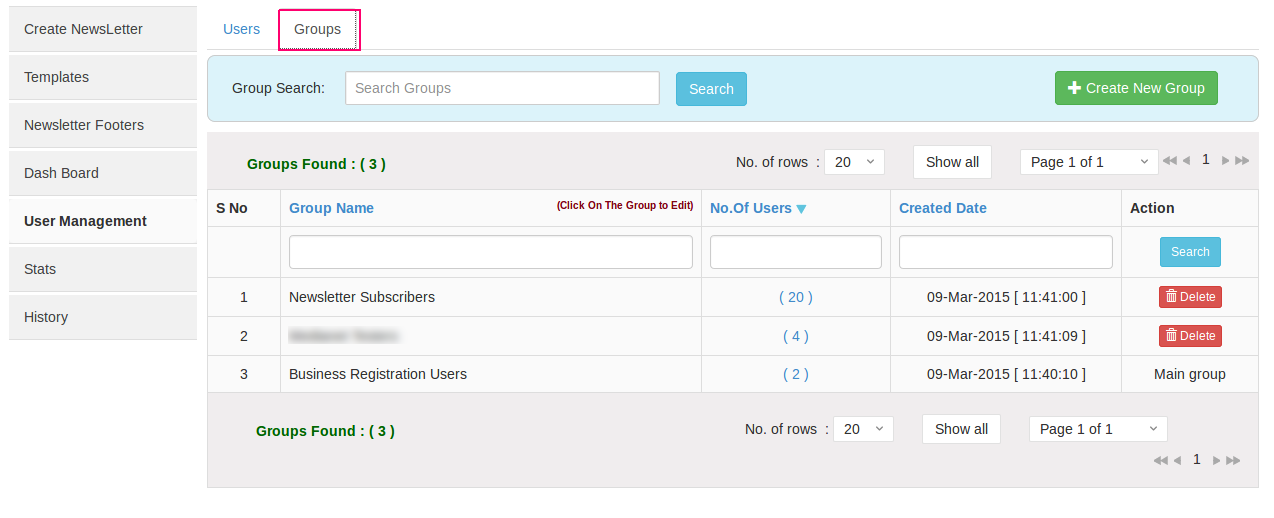
It will show the existing Group details in a table and option to Add new Group and Edit/Delete the Old groups.
To Create New Group, Click on the Create New Group and a pop up will be opened, Just enter the Group name and click Add Group, and the Group will be created.
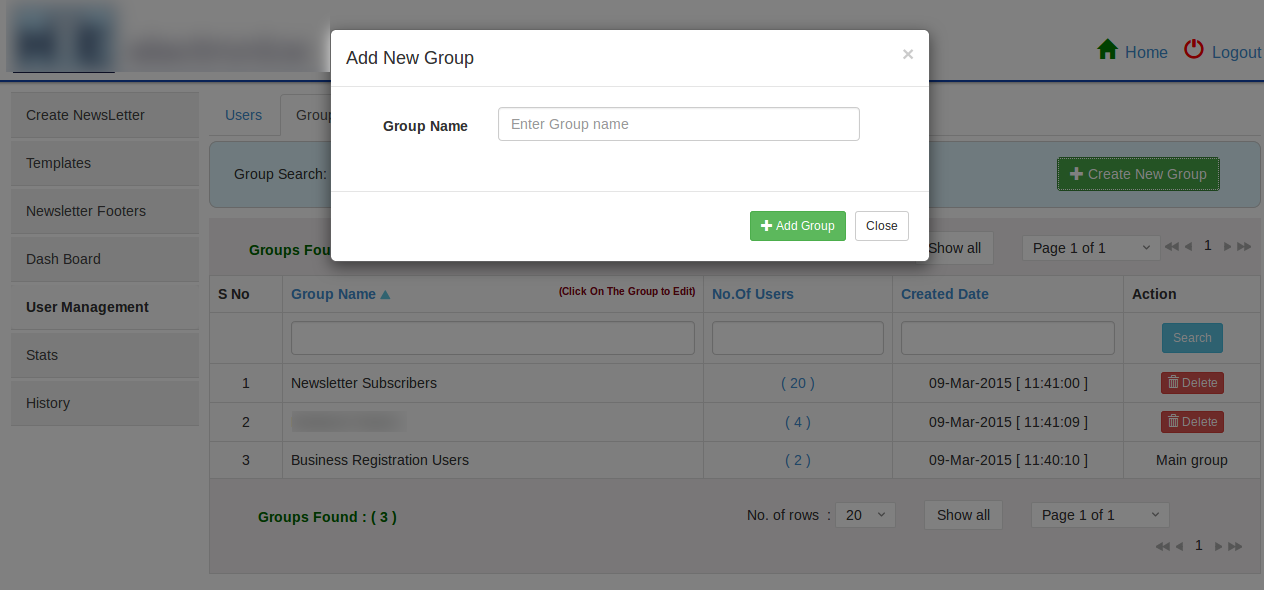
To edit the Group name, Just click on the Group and you can edit the Group and to delete the group, click on the Delete button of the group and confirm the deletion
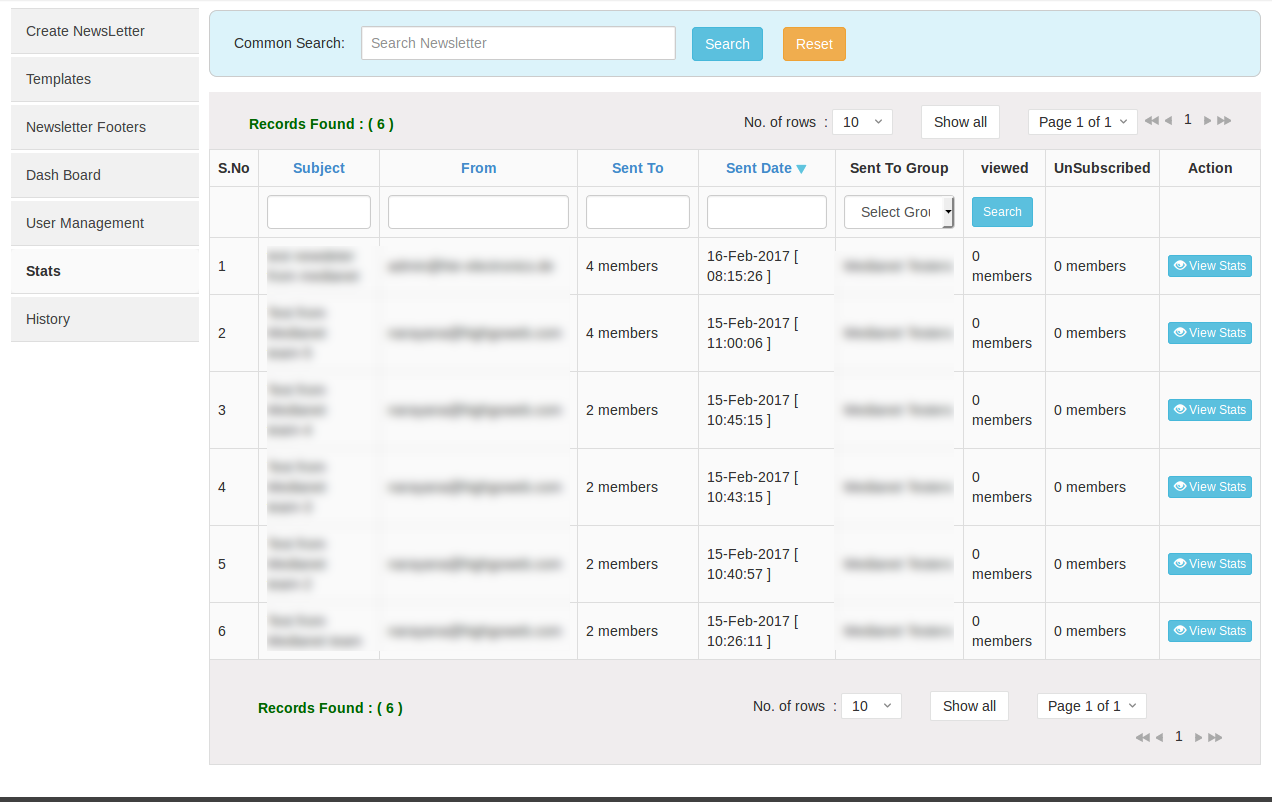
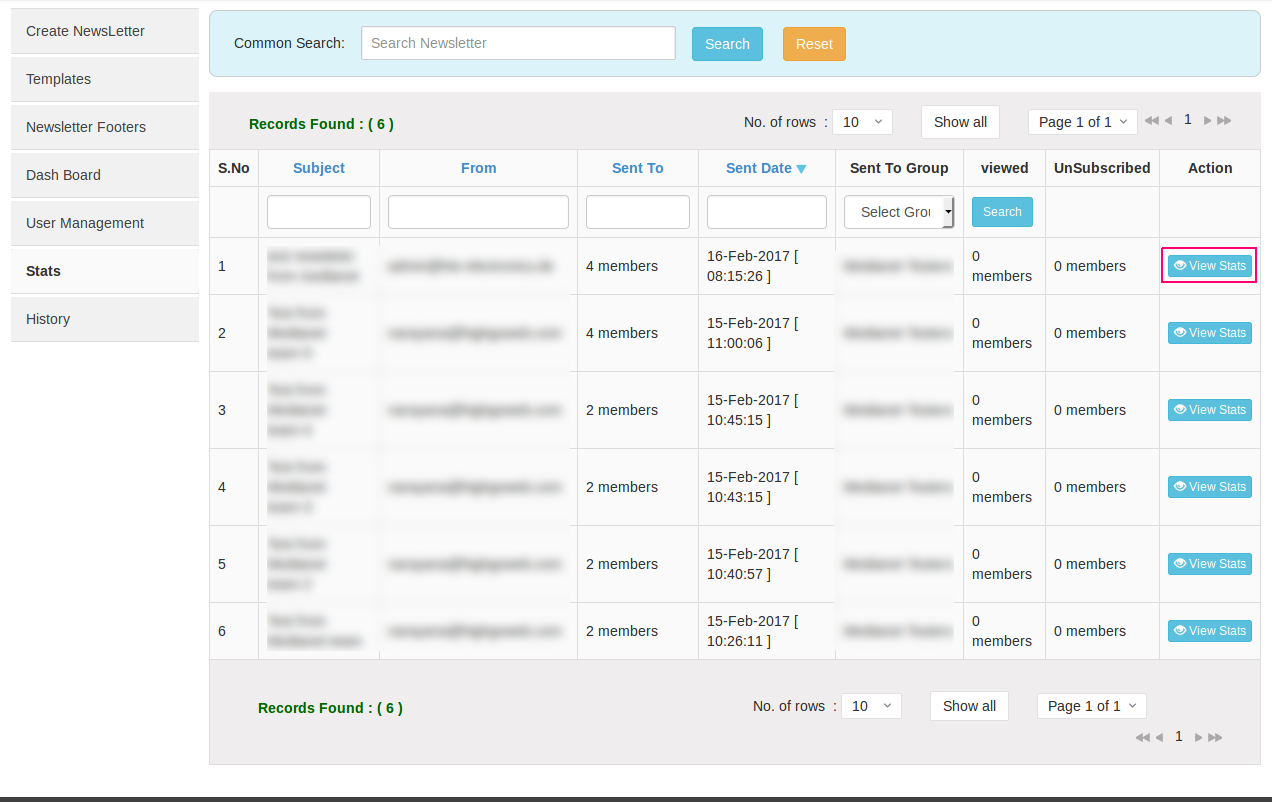
6 Stats
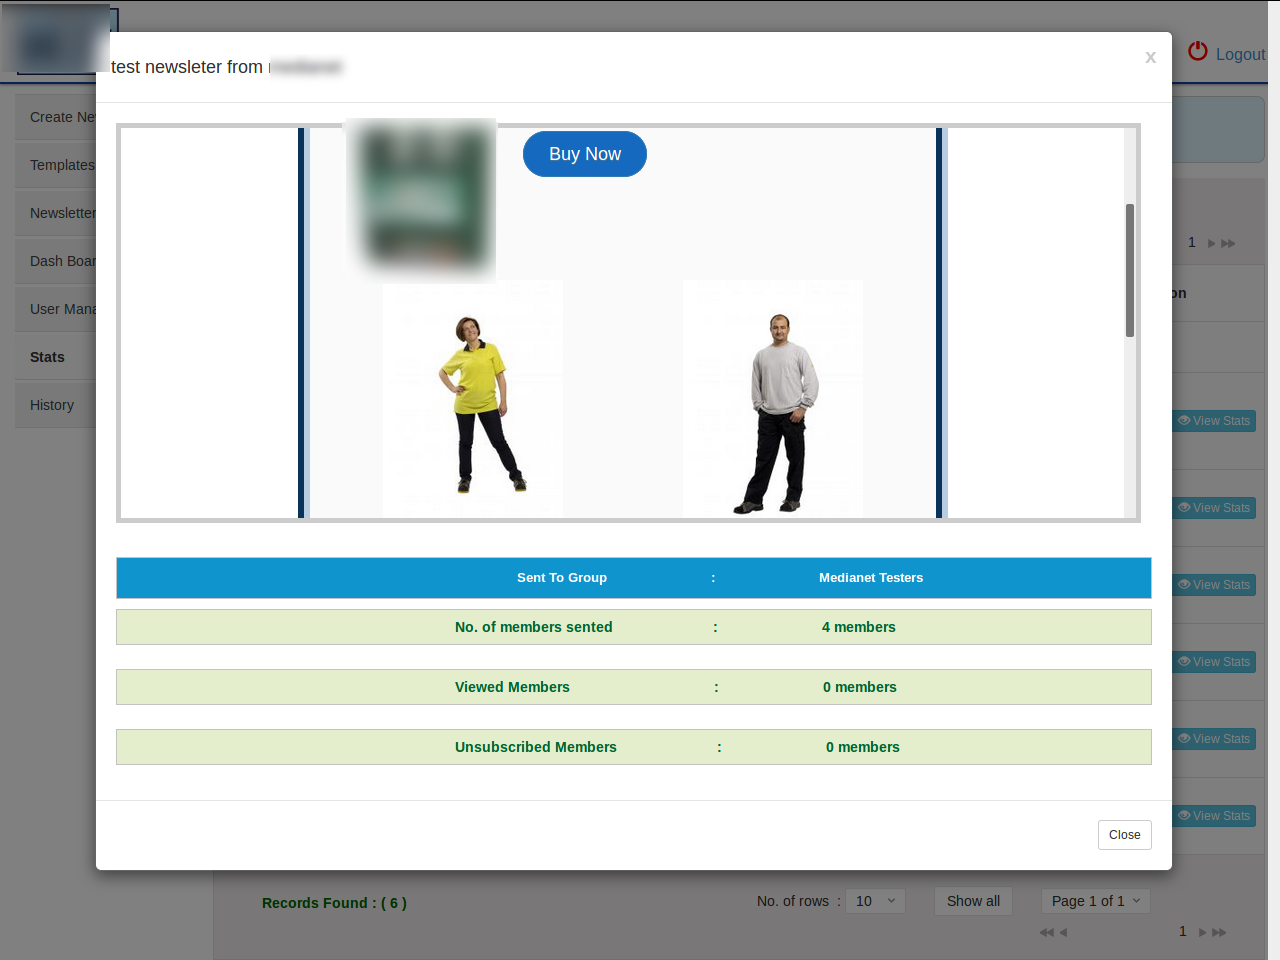
Stats will show the list of newsletters send and with the counts of Viewed members and unsubscribe members, and it will give an option to View the stats. Click on the View stats button of the newsletter and it will show the News letter and counts of Members to whom it is sent and how many members viewed it and Number of unsubscribe members.
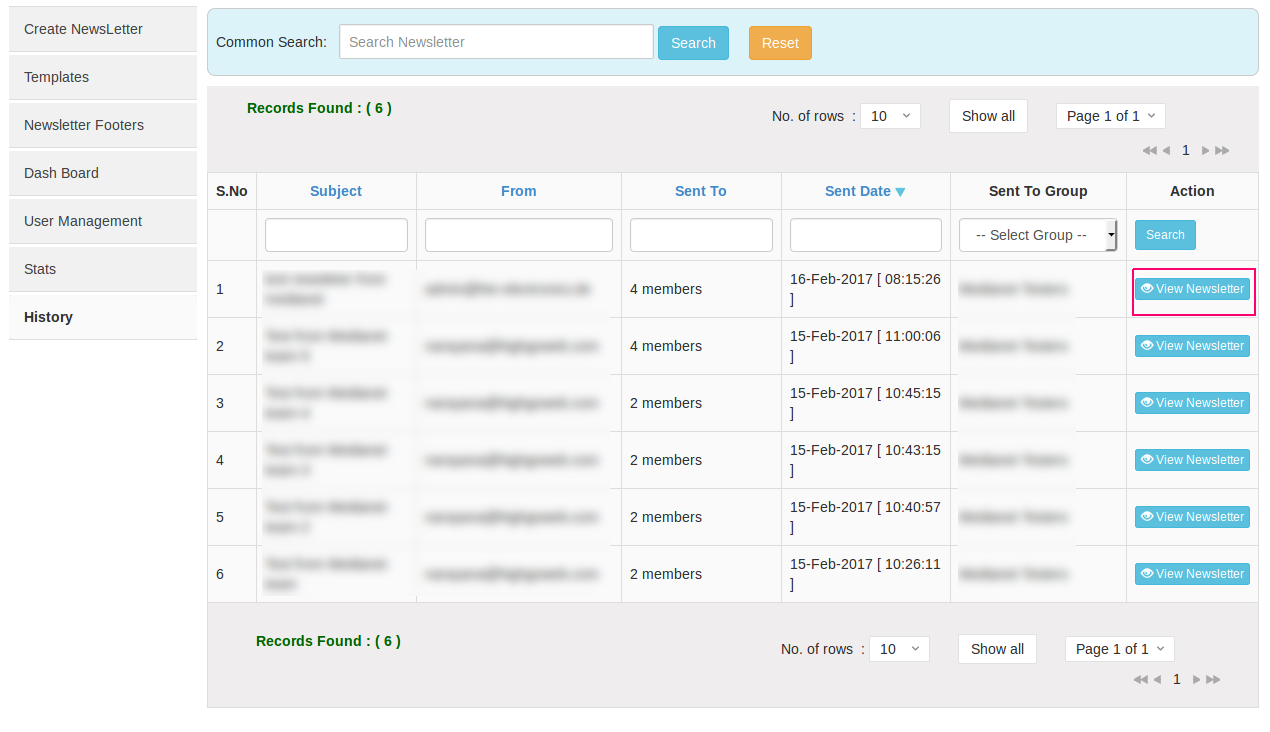
7 History
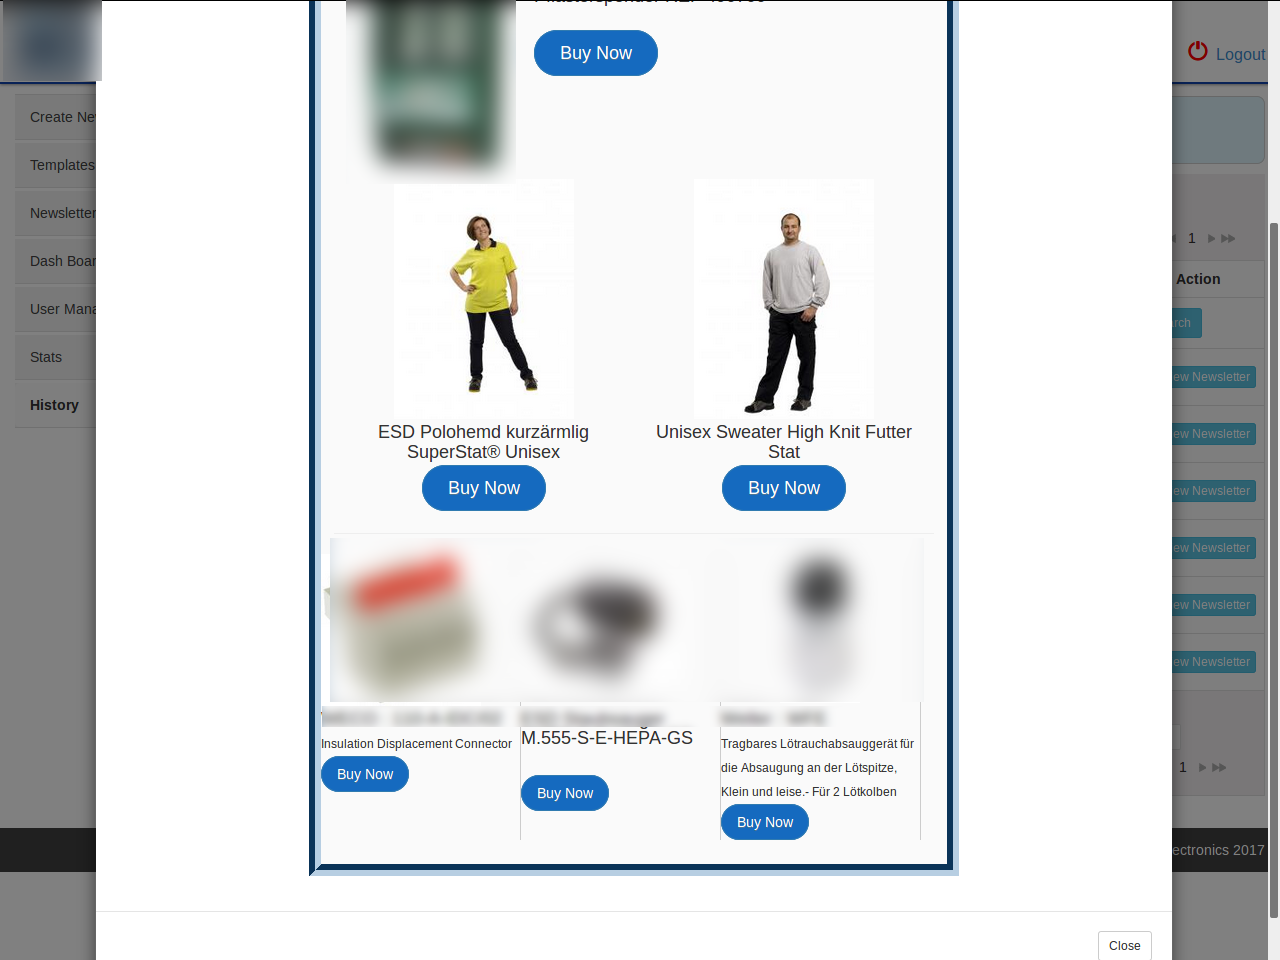
History will show how many newsletters were sent and you can view the sent newsletters. Click on the History tab and you will find a table with all the sent newsletters and who sent the newsletter and to how many members it was sent and to which group it was sent, all this information will be in here. And to view the sent newsletter you can click on the View Newsletter Button and a pop up with the preview of the sent newsletter will be displayed.

Like this one can Manage the Newsletter.