MediaNet Ticketing System:
Overview: The ticketing system by MediaNet is an easy way in which our customers can contact our service, support as well the development team to report for errors or bugs they come across or send fast requests for any changes and upgrades in their system. All tickets raised, errors or change requests are listed and managed in a professional manner so every body concerned are always in loop about the statuses on the various issues open and pending.
Adding a Ticket:
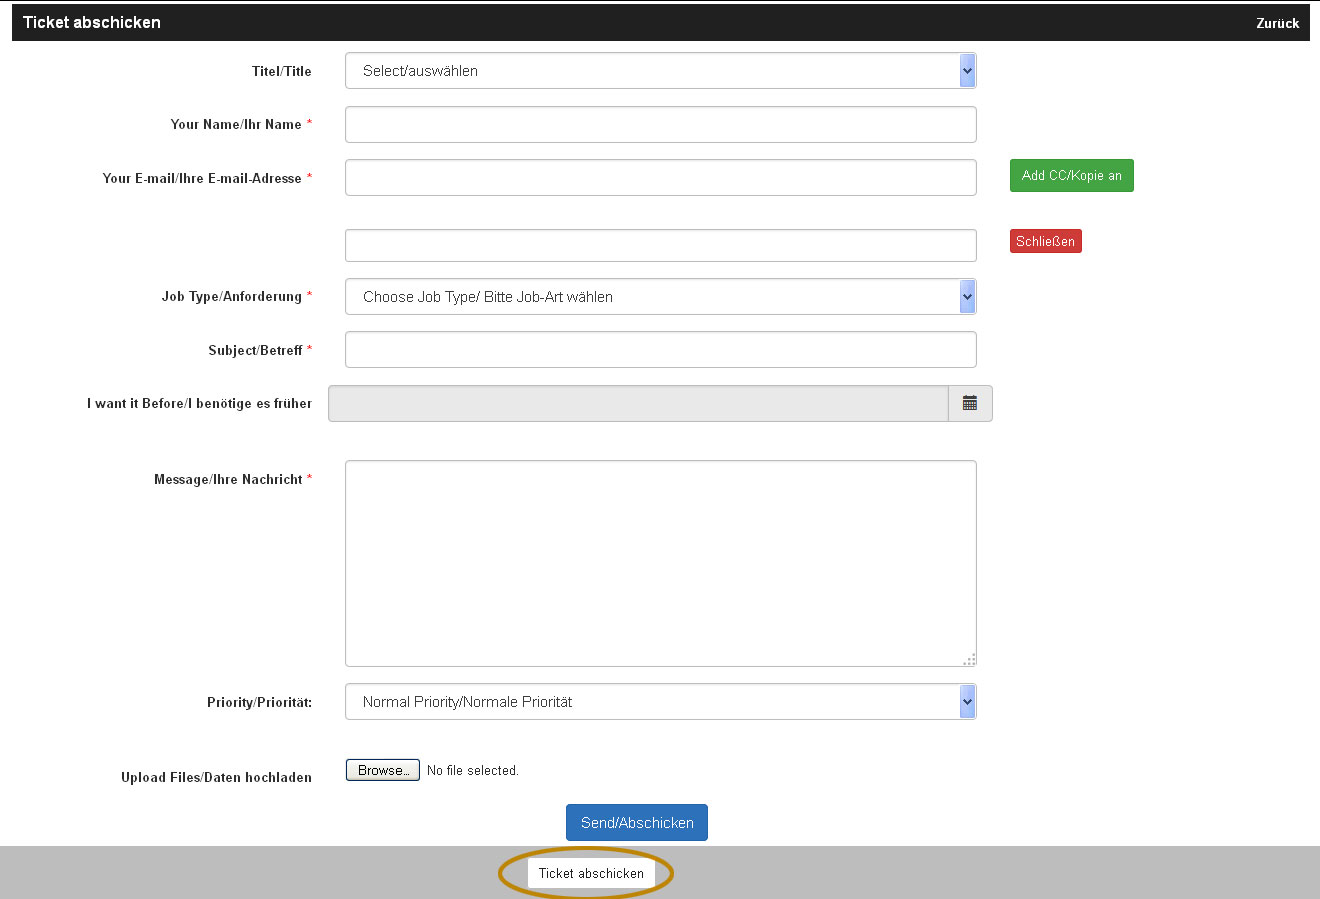
To add or create a ticket, first you should be logged in and have access to the shop admin end. Shop admin or users who have roles to Shop back end can login and click on Shop Admin link in the user end. Once clicked you are taken to the back end of the shop. In the shop admin interface in the bottom footer you will find the link Submit Ticket. Click on it and a page opens where you can create a new ticket. As you are already logged in the shop your details are preloaded in the Name, Email, fields. You can choose to edit them if you want to add ticket on some one behalf. You can freely edit the Name, Emails fields and additionally if the ticket is to be managed by multiple people you can even add the additional emails by clicking on the button Add CC/Copy a new text box appears requesting you to add other emails, here you can add multiple emails separated by “,”. After entering those details now you can choose the Job type. From the drop down selection you have the options such as Error Report, Customisation, New Job. You can select the one relevant job type and if you choose, Customisation or New Job an additional field appears requesting you to tell us if you want first an offer from us for the customisation or new job before we work on it or you want us to perform the task directly with out making an offer. Select one and proceed for further entering the task details like the Subject/Title. Once you enter the Subject if you want the task/ticket to be finished by any preferred date you can select the date from the date picker, after that you can explain in detail the task. Once you explain the task/ticket in detail, you can choose if it has to be done on High Priority or Normal priority and additionally you can even upload more supporting information via the upload section. Once all the details are given simply click on Send and a ticket is registered. An acknowledgement mail is sent to the user who registered the ticket with the ticket number and its details for further reference.
Tracking of Tickets:
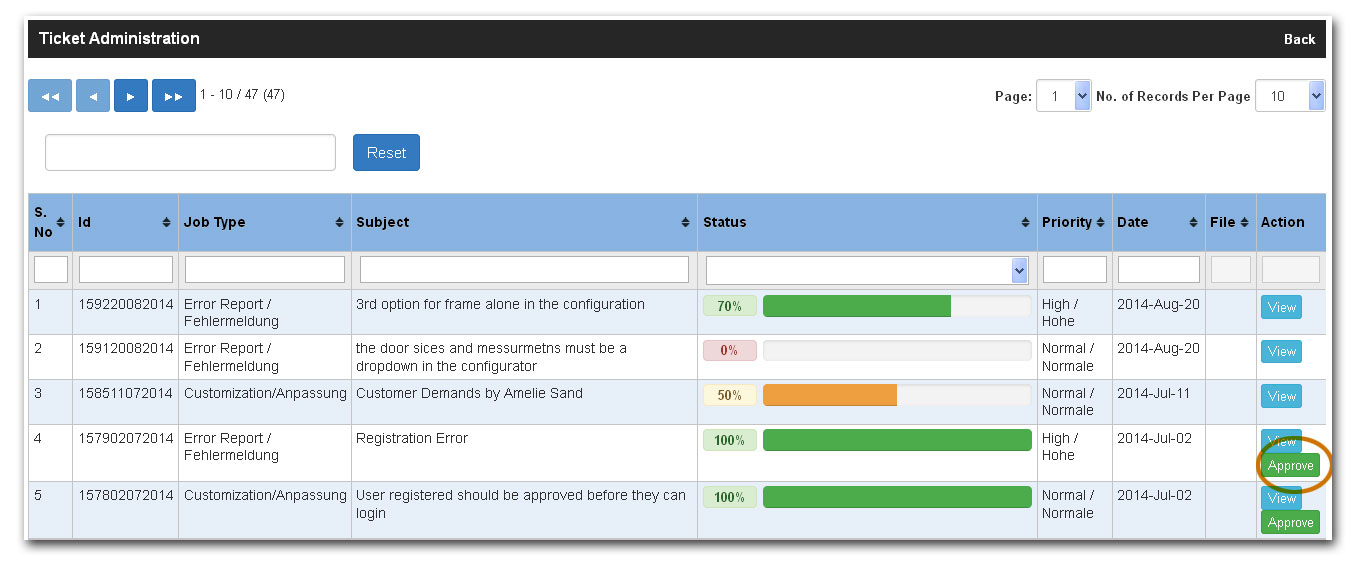
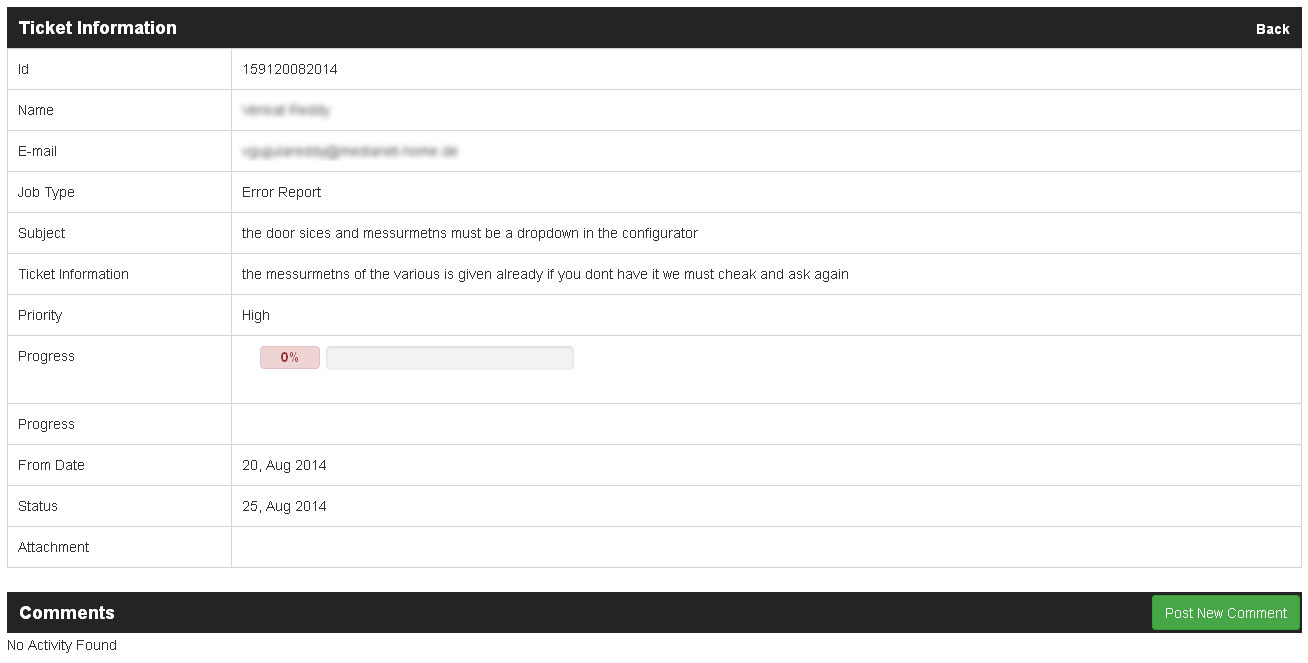
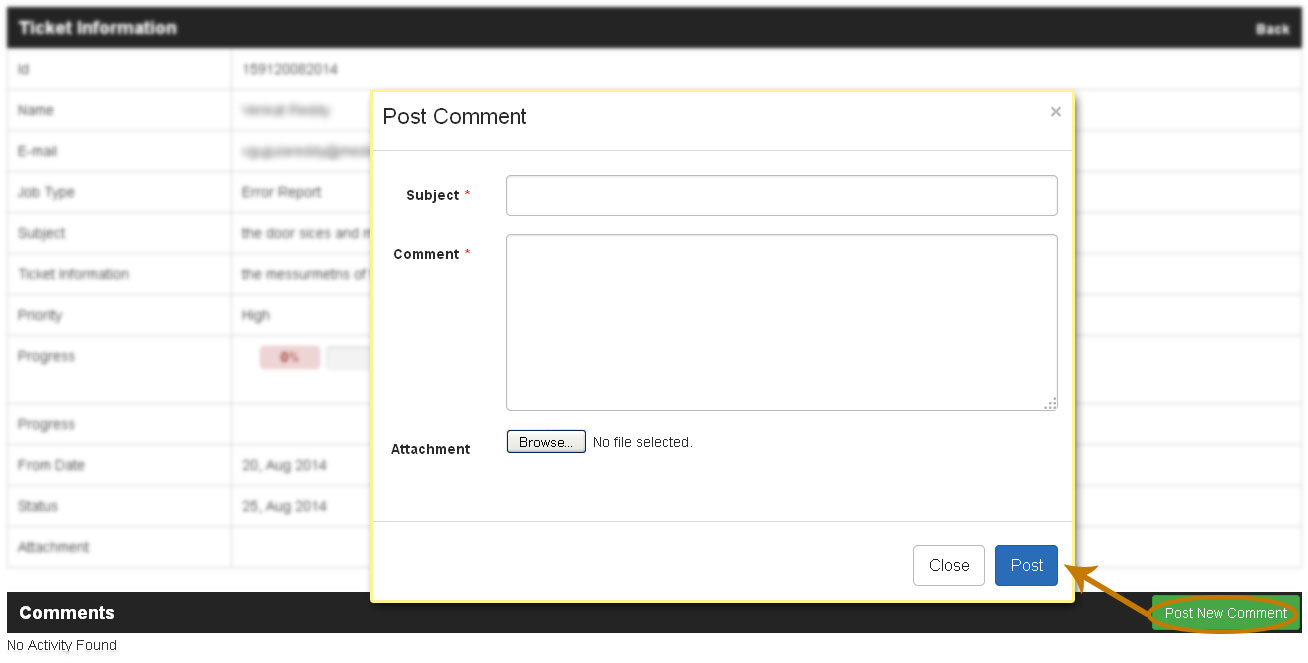
All the tickets raised by the Shop admin and other users with roles can easily be tracked via the shop admin interface. To access this tracking interface of tickets click on the menu Tickets in the left side menus in the shop admin end. Once clicked a page opens listing all the tickets with search and sort options. All the tickets are listed in tabular view, with the most recent tickets being displayed first, you can see in the view the ticket id, Job Type, Subject along with its Current Status in progress percentage. Also shown in the tabular view are Priority and the date the ticket was registered. To check more details of the ticket you can click on the button View and a page opens showing the complete information of the ticket. Here the admin can add/post additional comments if he wants to communicate any information about the ticket to the development team. Also the comments or queries posted by the development team are shown for the admin which he can reply. In the tabular view the admin or users who have access can search and sort the tickets easily. They can search with a keyword in the search box or they can sort by added data, progress or with ticket id by clicking on the headlines.

Closure of Tickets and Notifications:
When ever tickets related work is completed by the development team, then they would formally update the progress to 100% which is closed status. Once the progress is updated, automatically an email would be sent to the users who have raised the tickets notifying them that the task is complete which they can check and confirm the same. After verifying if the task is really complete the customer then can click on the link which is sent via email to confirm the completion of work. The ticket approval can be done either via the link customers receives through email or via the tickets interface when clicked on View, the customer can find the option to Approve the completion of task. While confirming the completion of task the user can also rate the service MediaNet offered, by selecting in what level have they been satisfied with the service. If the customer finds the work in complete or if they are not satisfied with the completion and service then the customer can Reject the completion of task and add comments or explain the reason for dissatisfaction while rejecting. The same is then notified to the development team that the customer has rejected the task and the development team can verify the reasons and rework on it and re close the ticket if complete. Once it is re closed again the customer again gets the notification and he can re check the status and approve the completion if he feels satisfied this time around.